


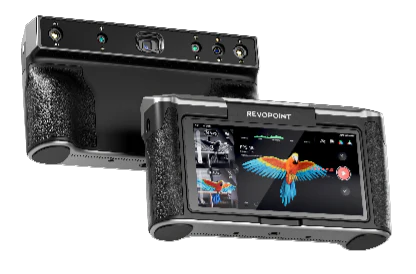


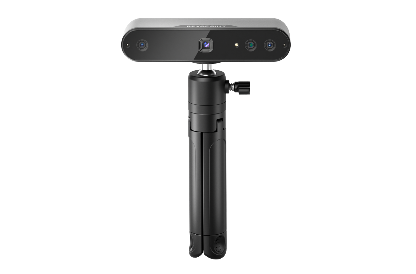


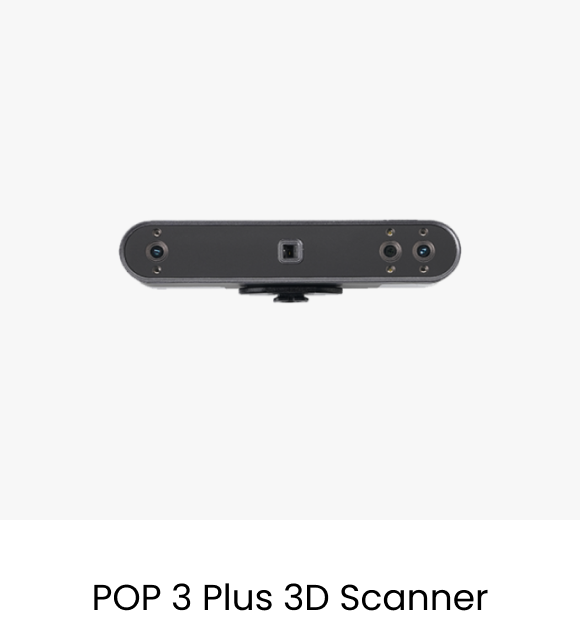
Revopoint POP 3 Plus: Portable 3D Scanner for Vibrant Color Scans
 Free shipping for 3D scanners, 3-5 days fast receipt.
Free shipping for 3D scanners, 3-5 days fast receipt.
Delivery time deviates according to the effectiveness of the transport company, please wait patiently for your goods
Please read our full shipping policy here.


 Safe and Reliable Payment Methods
Safe and Reliable Payment Methods
We support PayPal and credit cards, including Visa, Mastercard, American Express, and JCB.

 14-day no-hassle returns, 30-day free exchange, 2-year warranty.
14-day no-hassle returns, 30-day free exchange, 2-year warranty.
 24/7 online customer support.
24/7 online customer support.
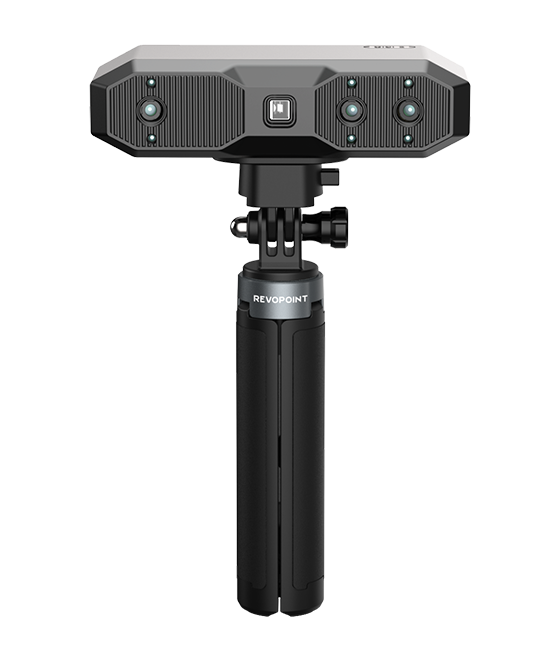
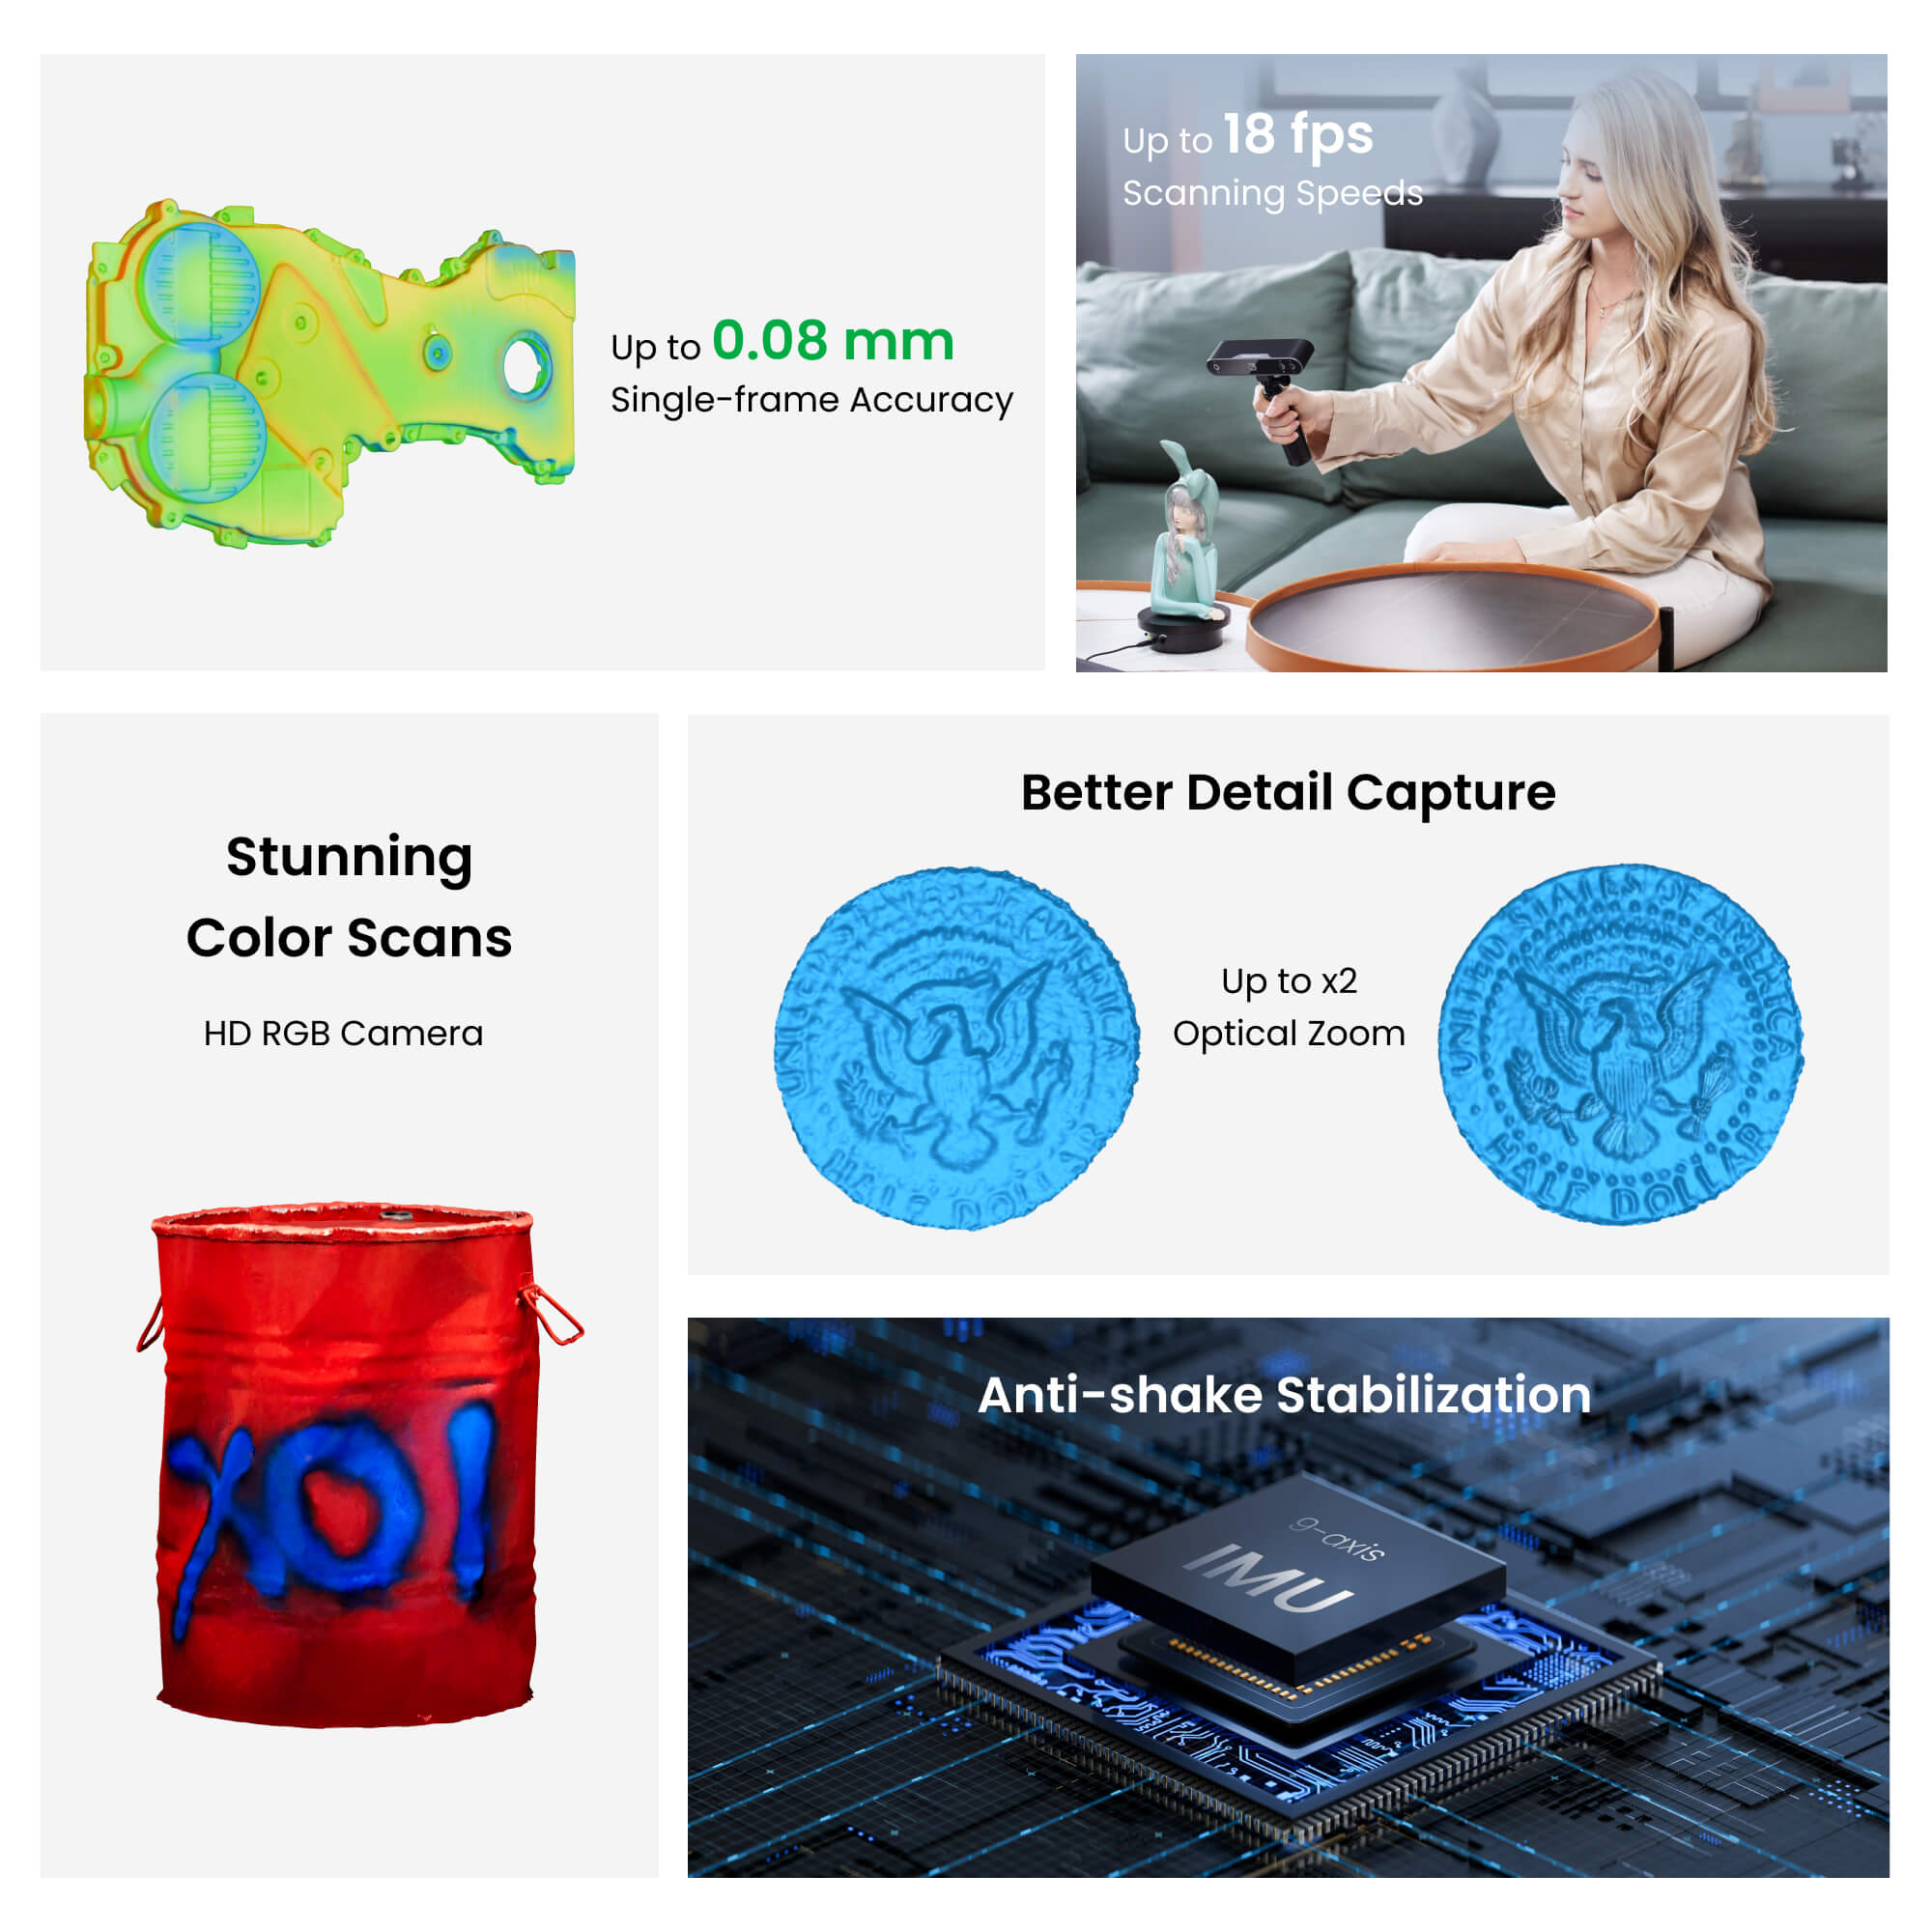
Every Detail Optimized
The POP 3 Plus updates the POP series with 20% better accuracy and precision and added optical zoom. Whether you need an accurate 3D model for 3D printing, animating, reverse engineering, modifying vehicles, or other applications, it's ready to help.
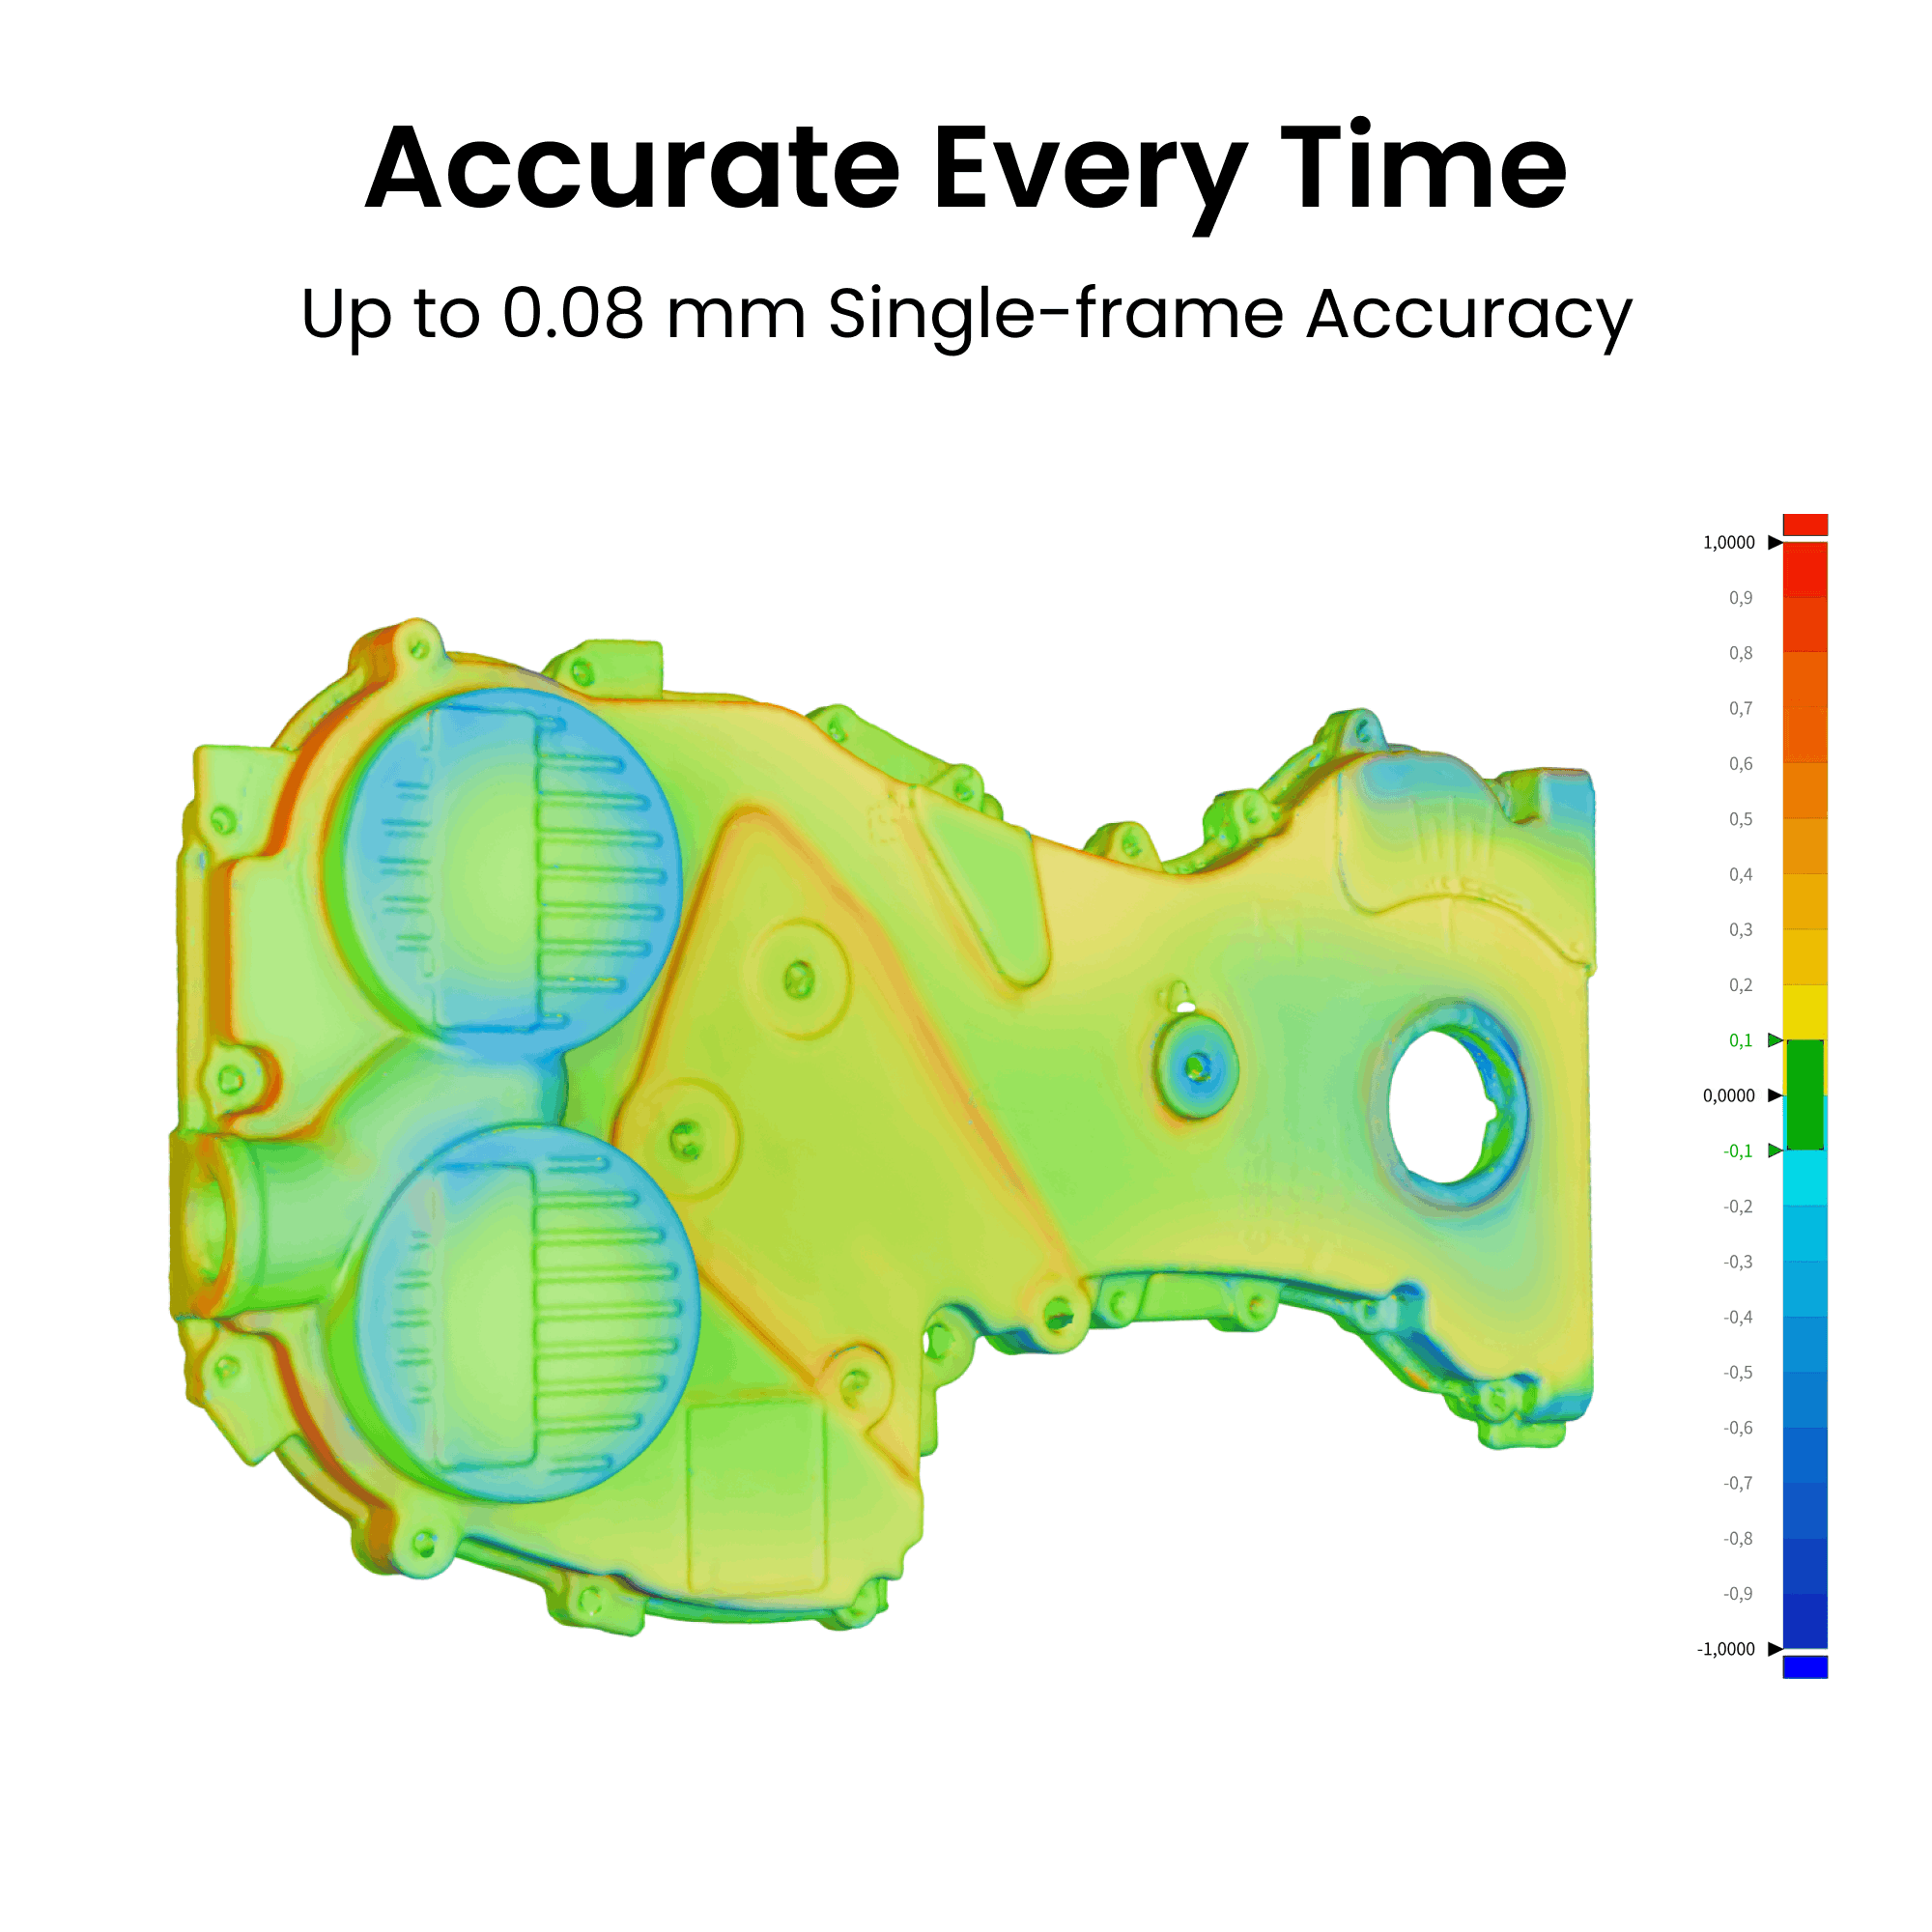
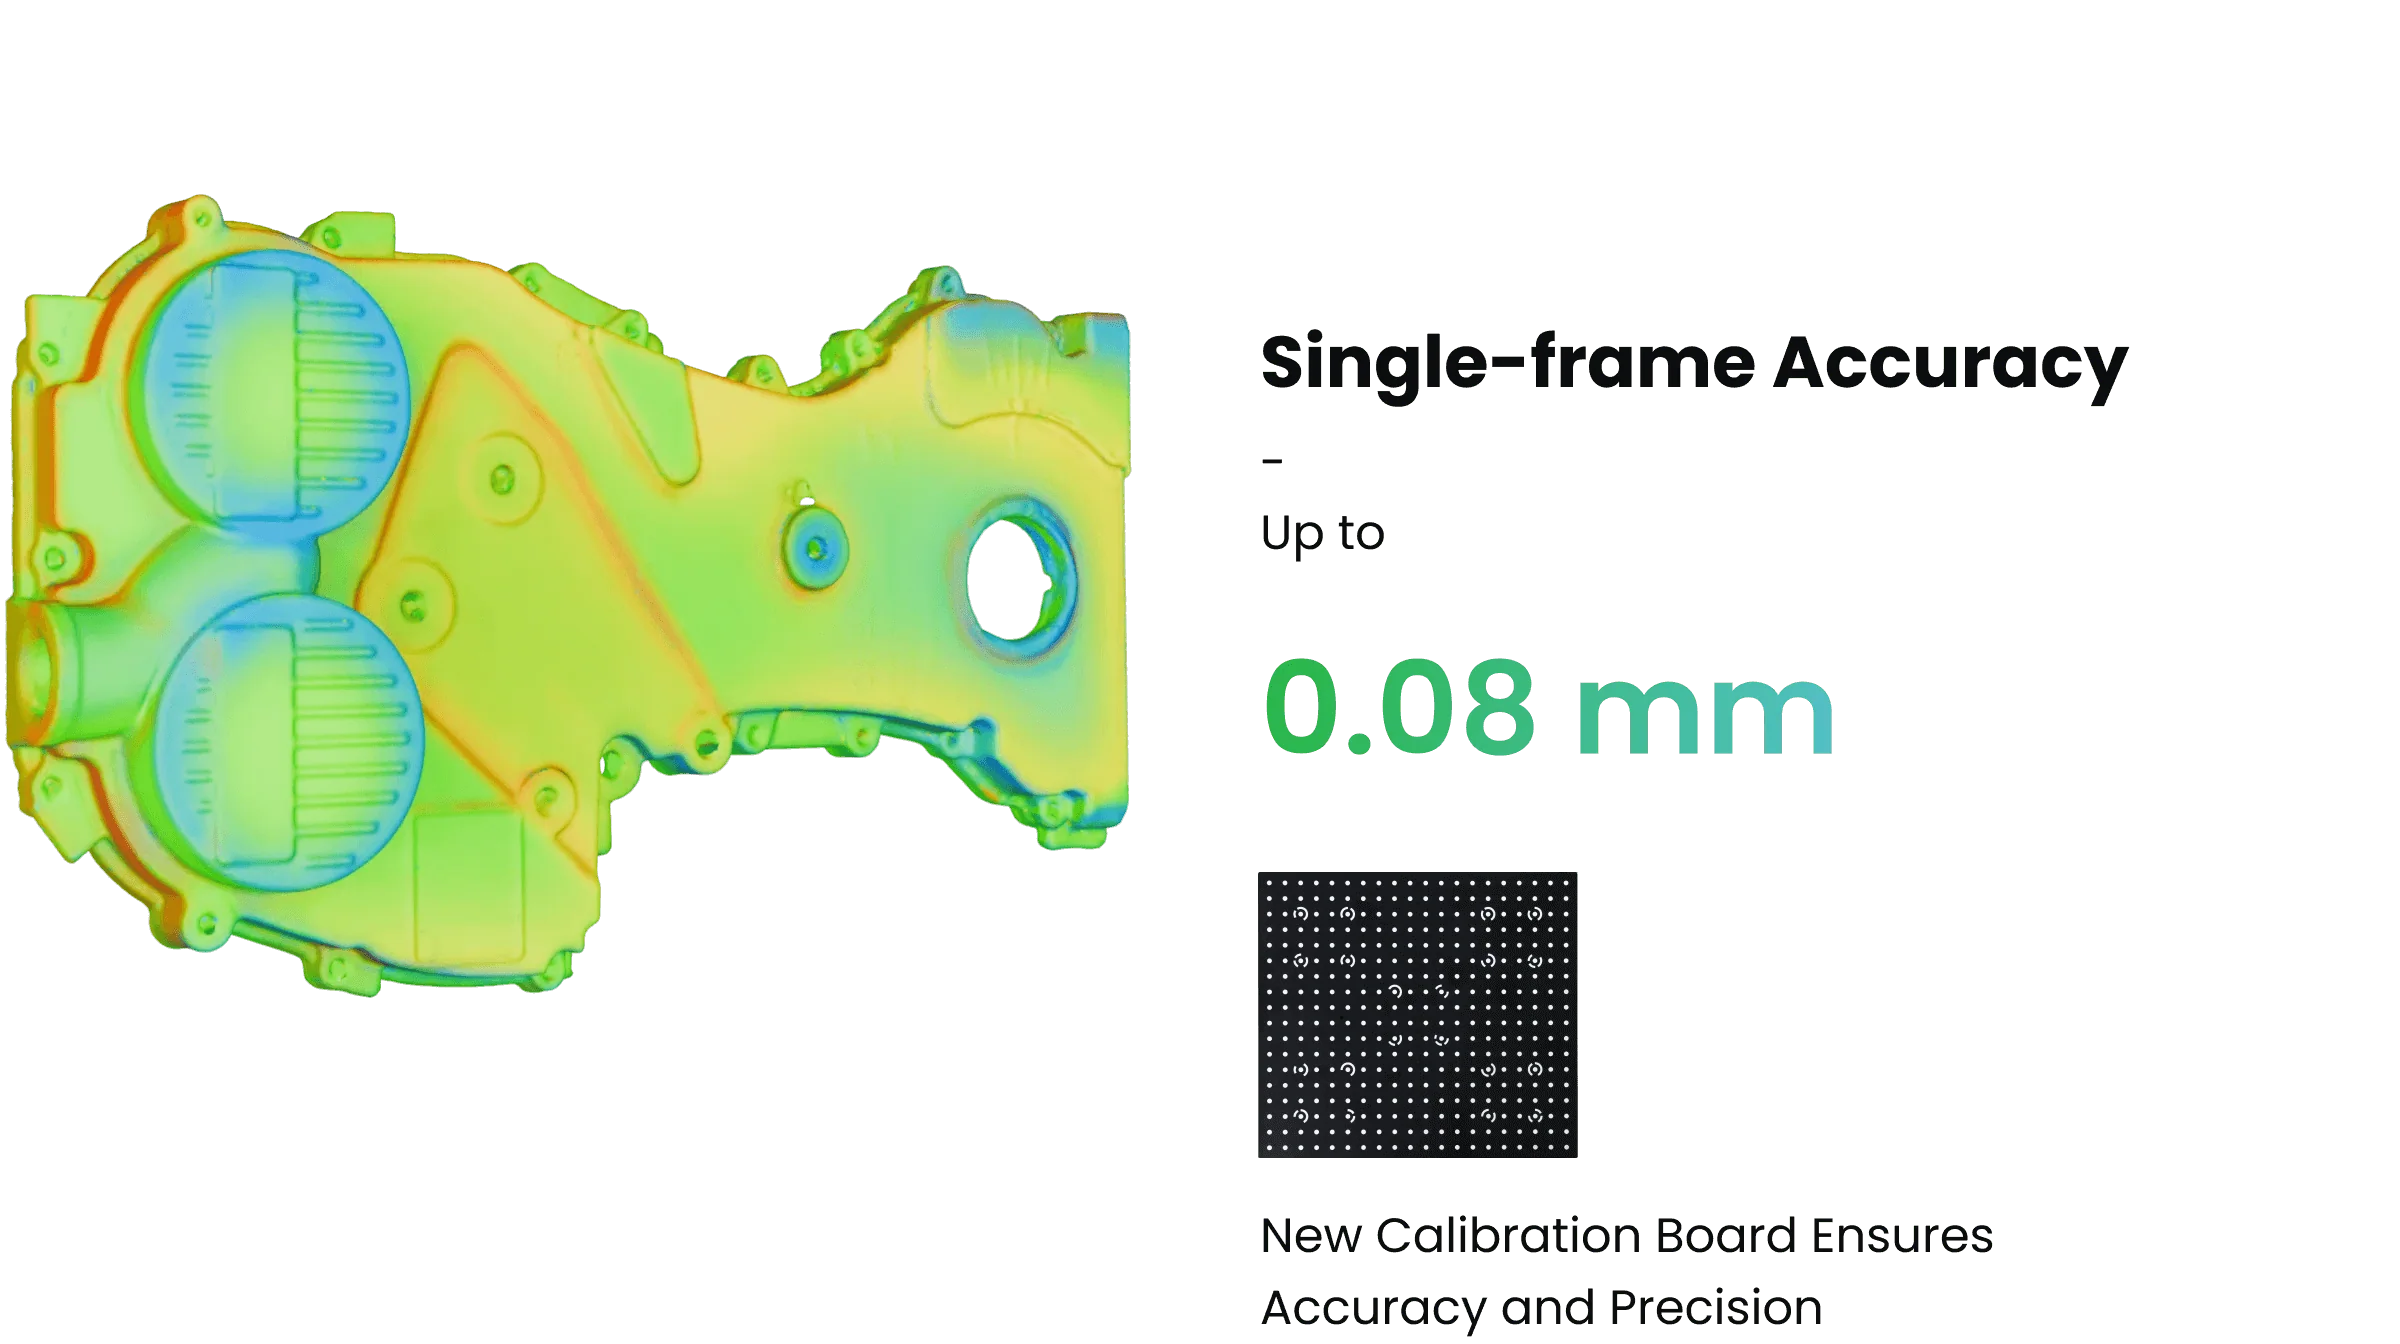
Accurate Every Time
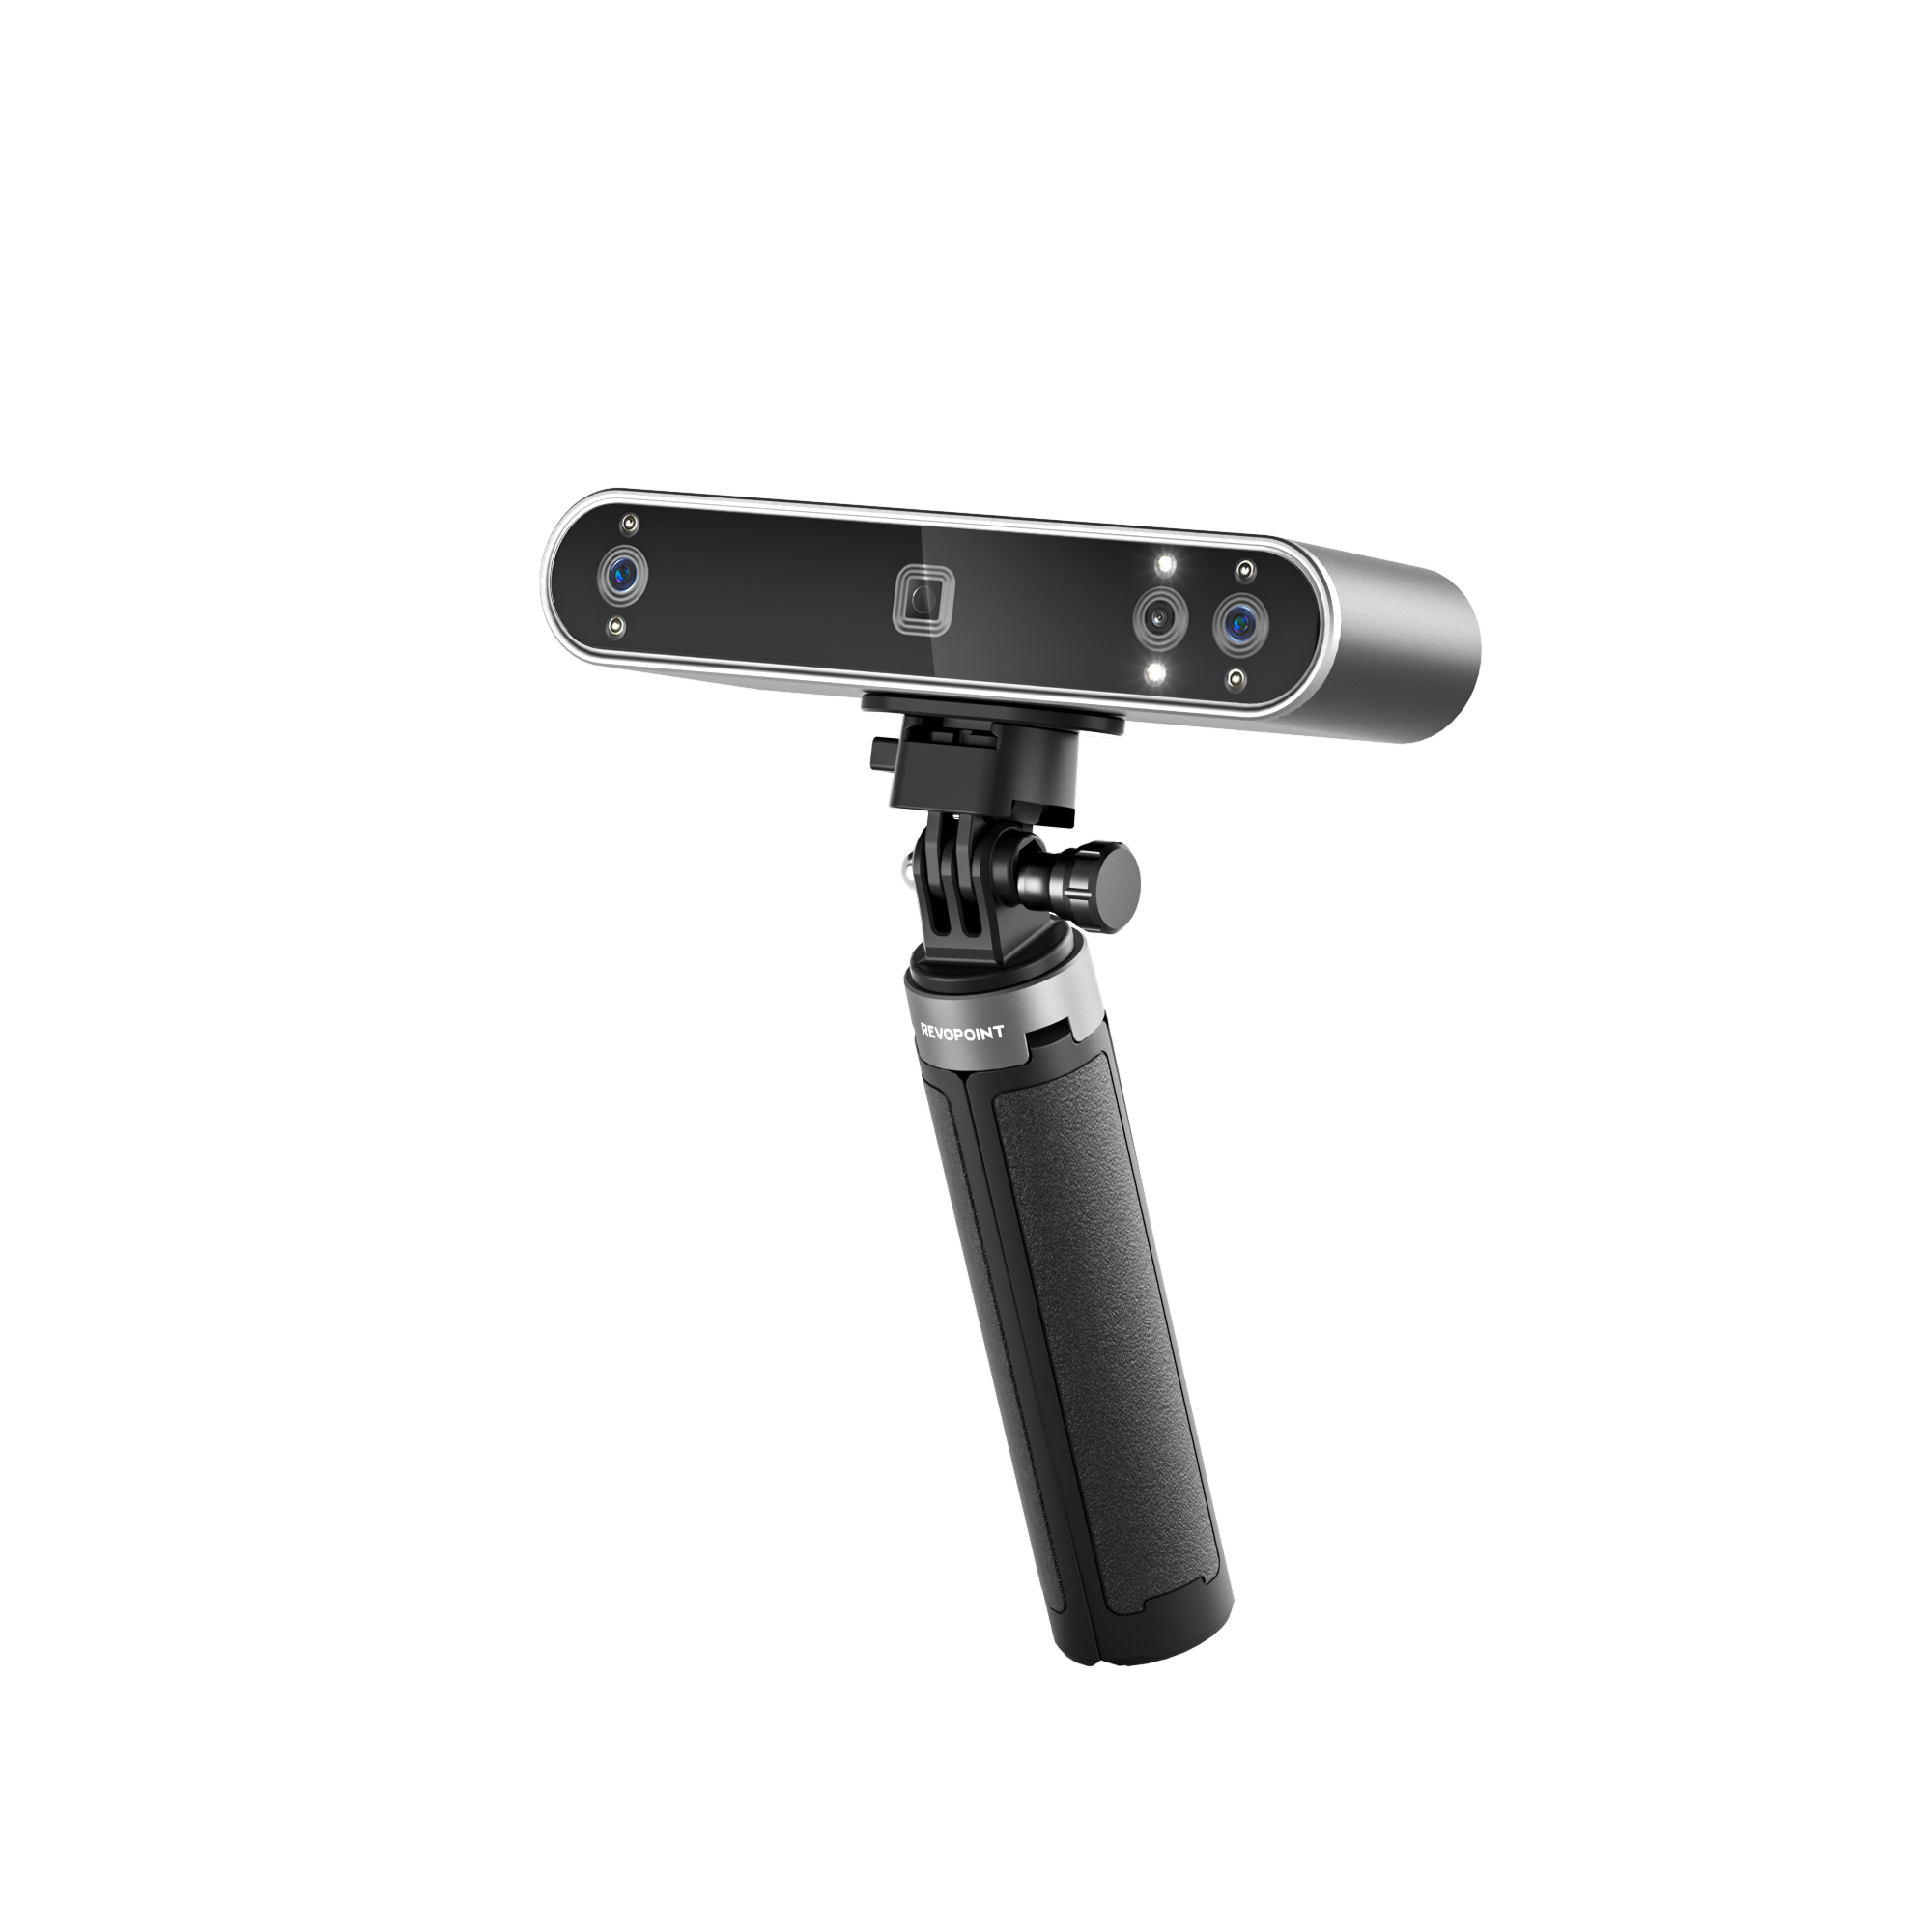
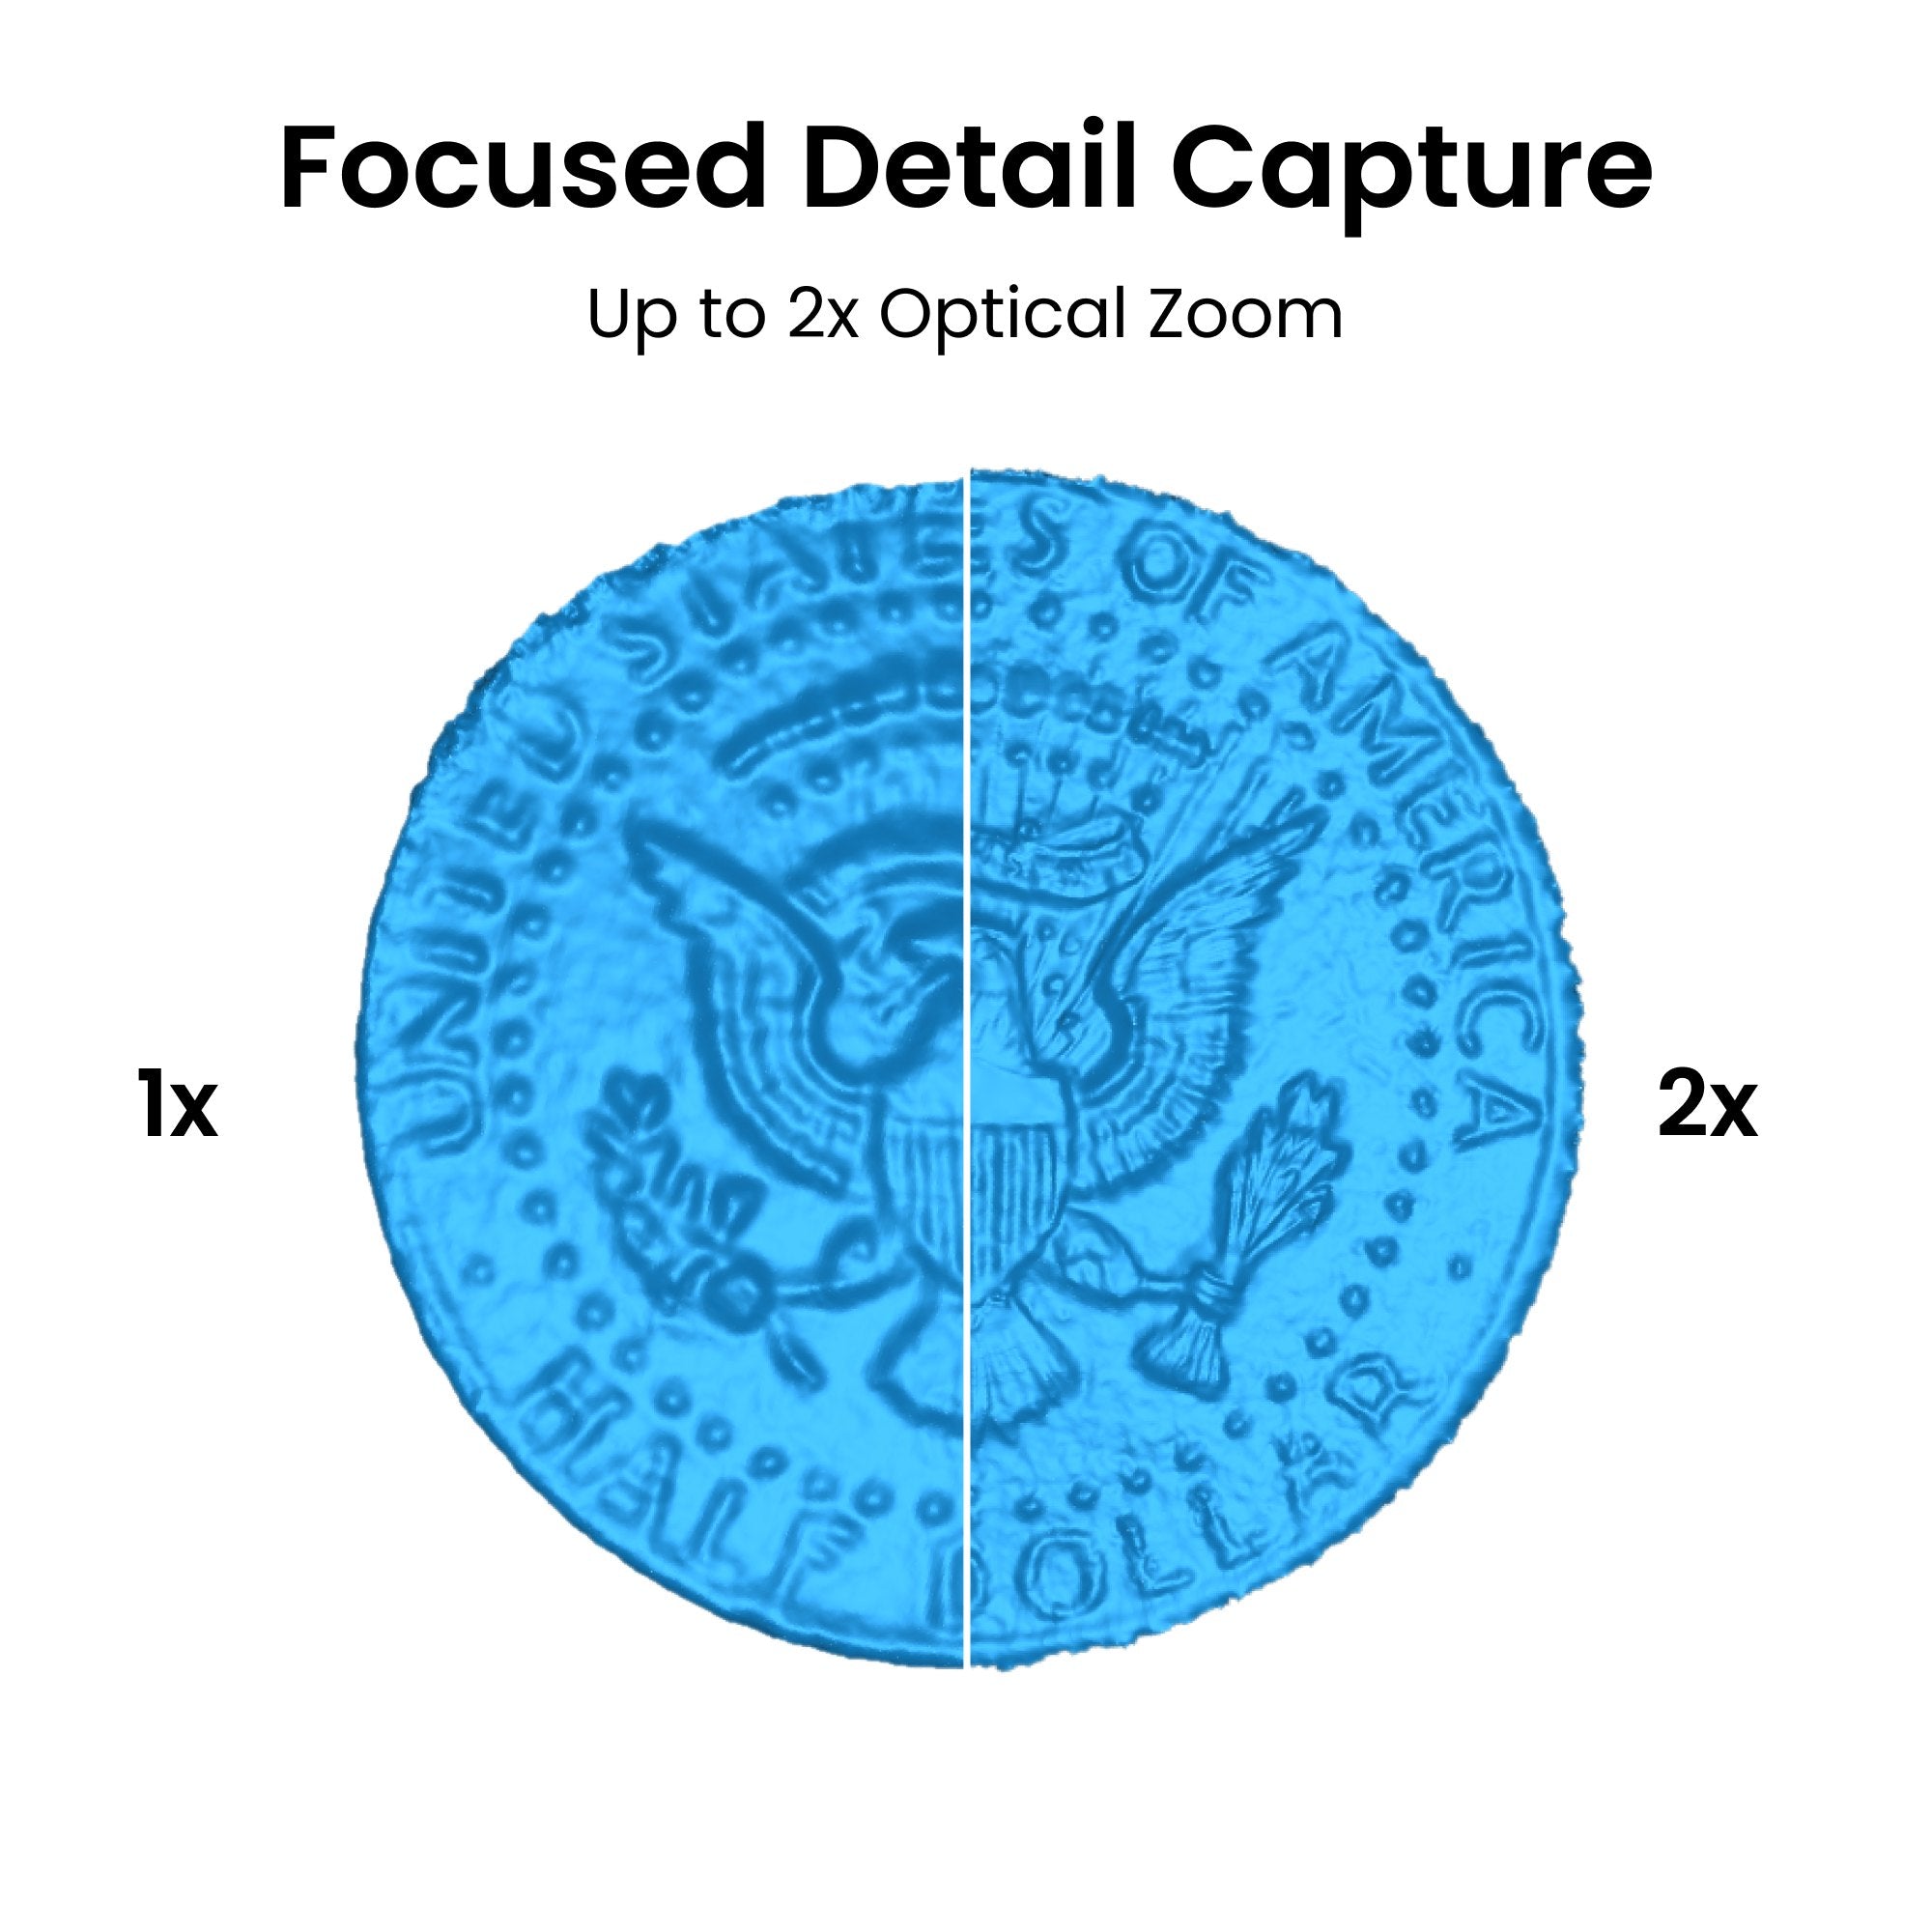
Capture Finer Details
New Optical Projector Zoom (Up to 2x Zoom)


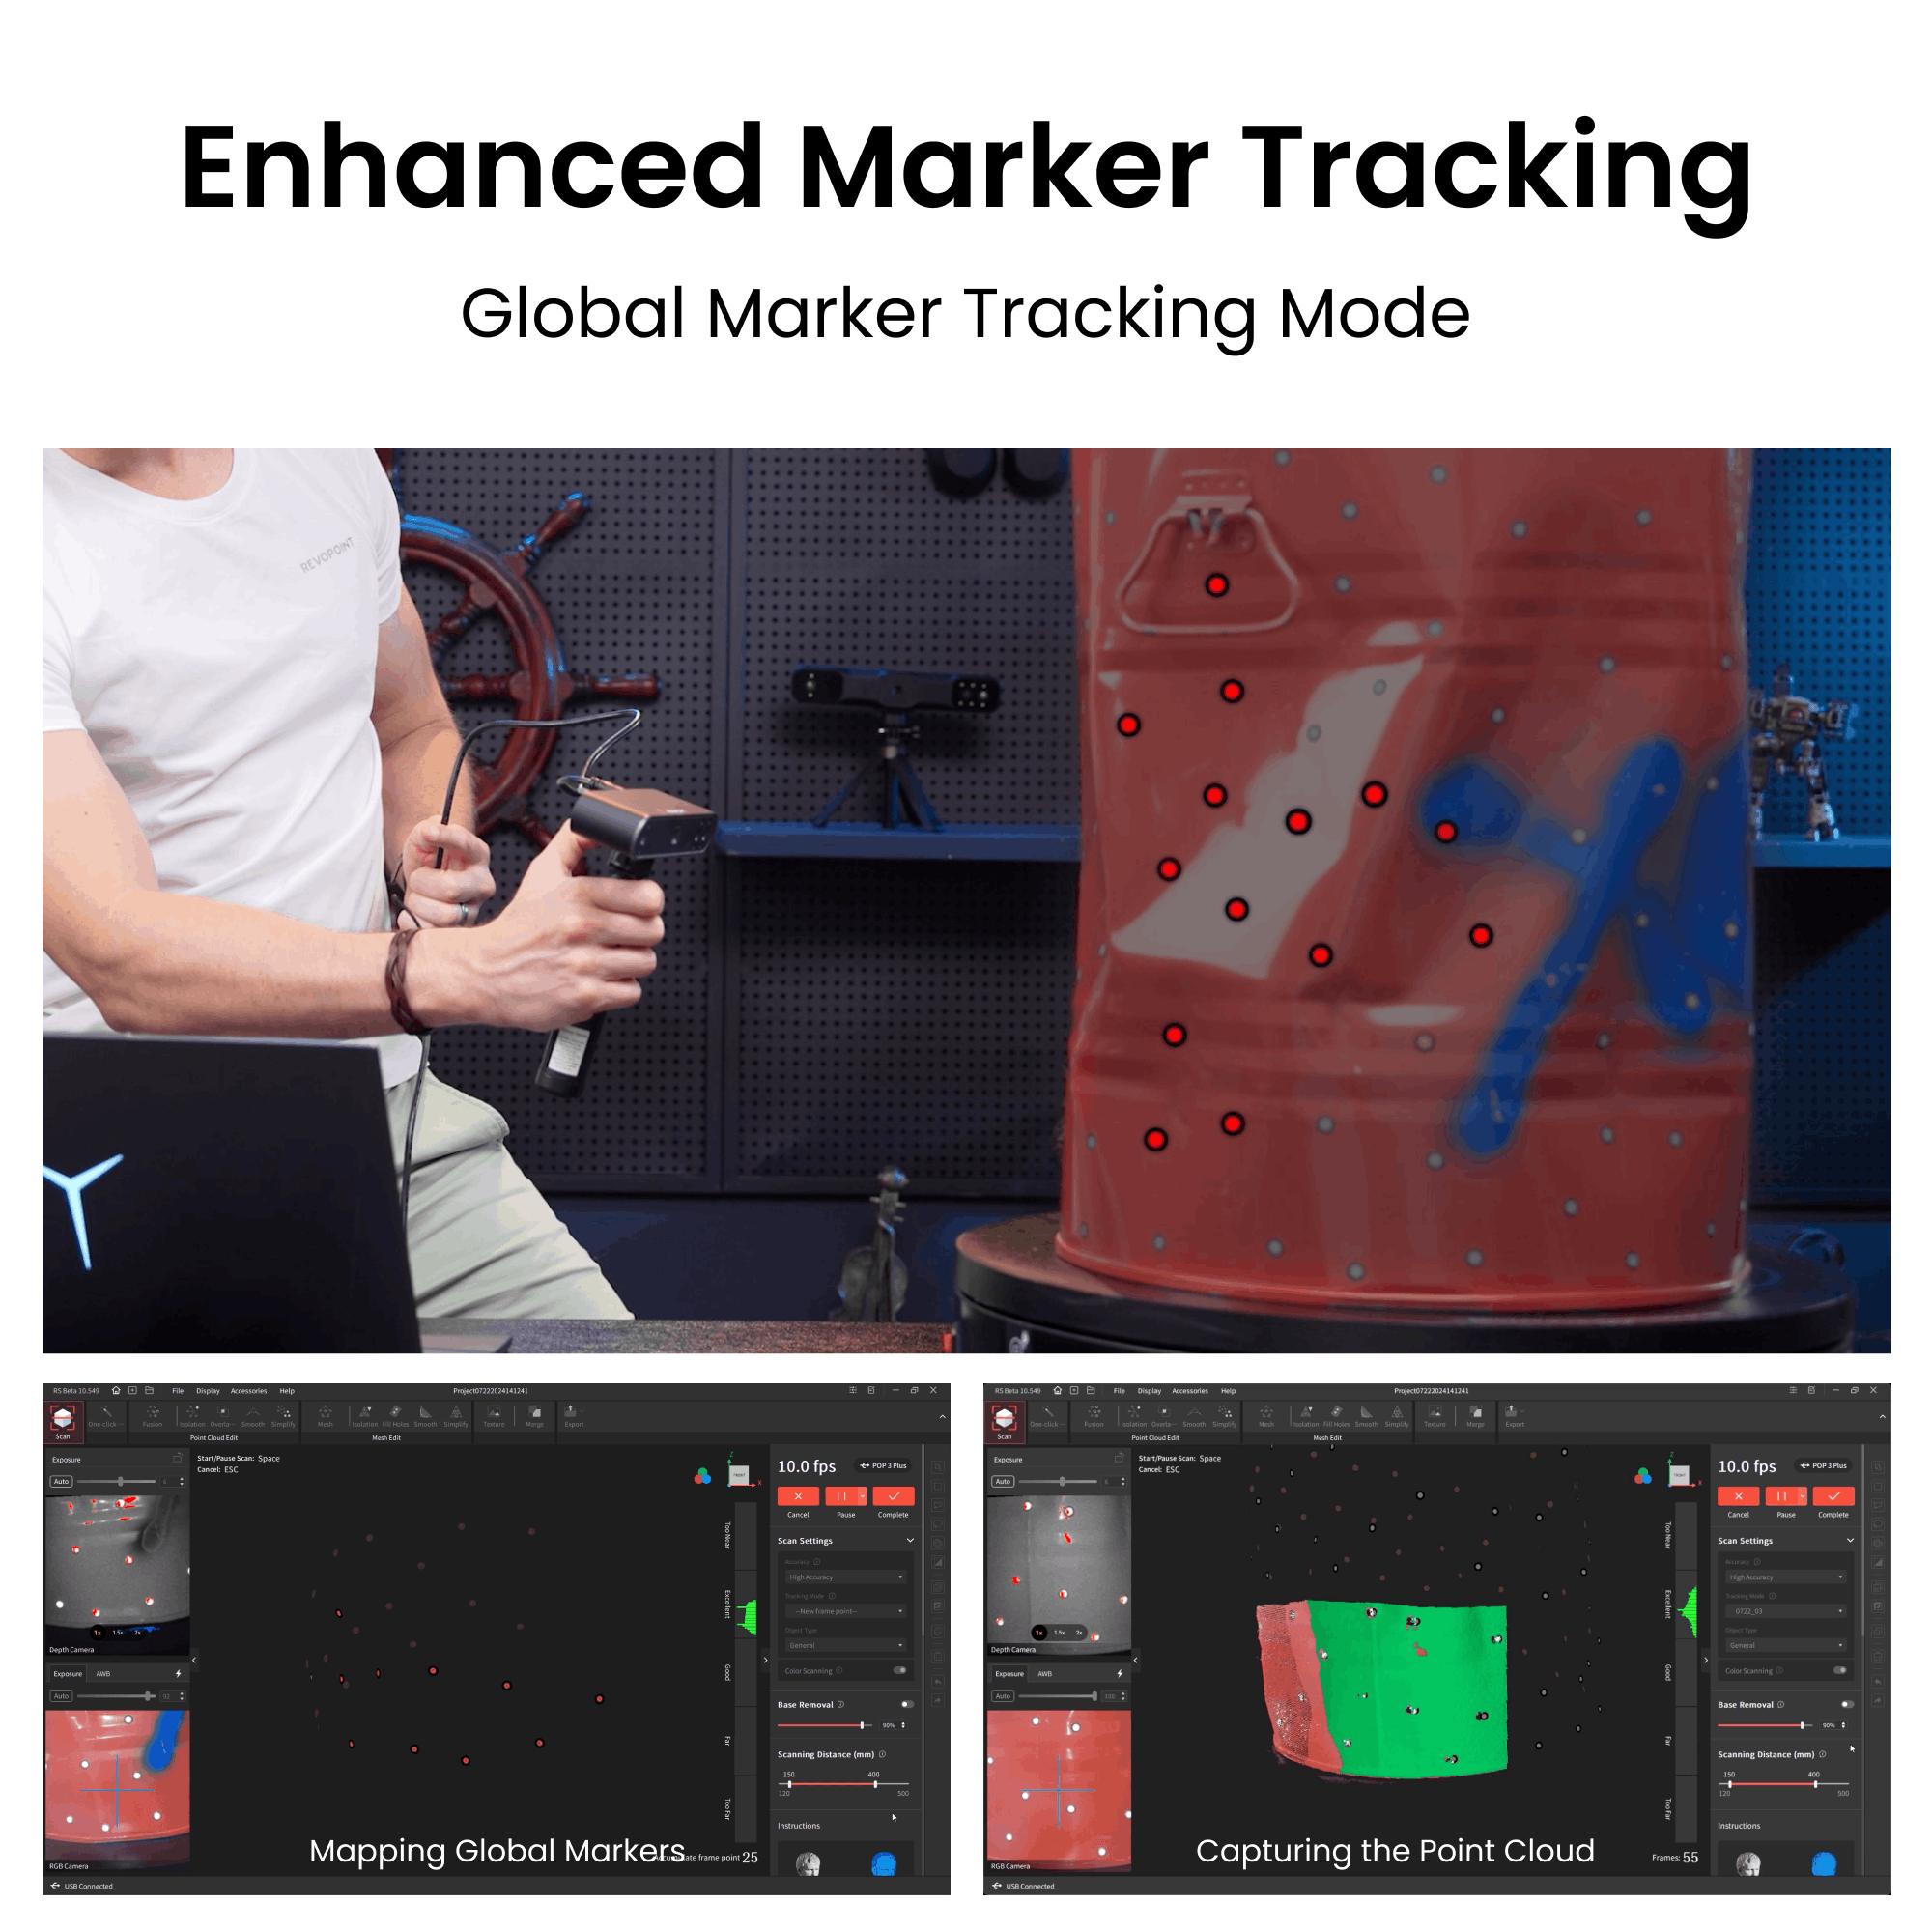
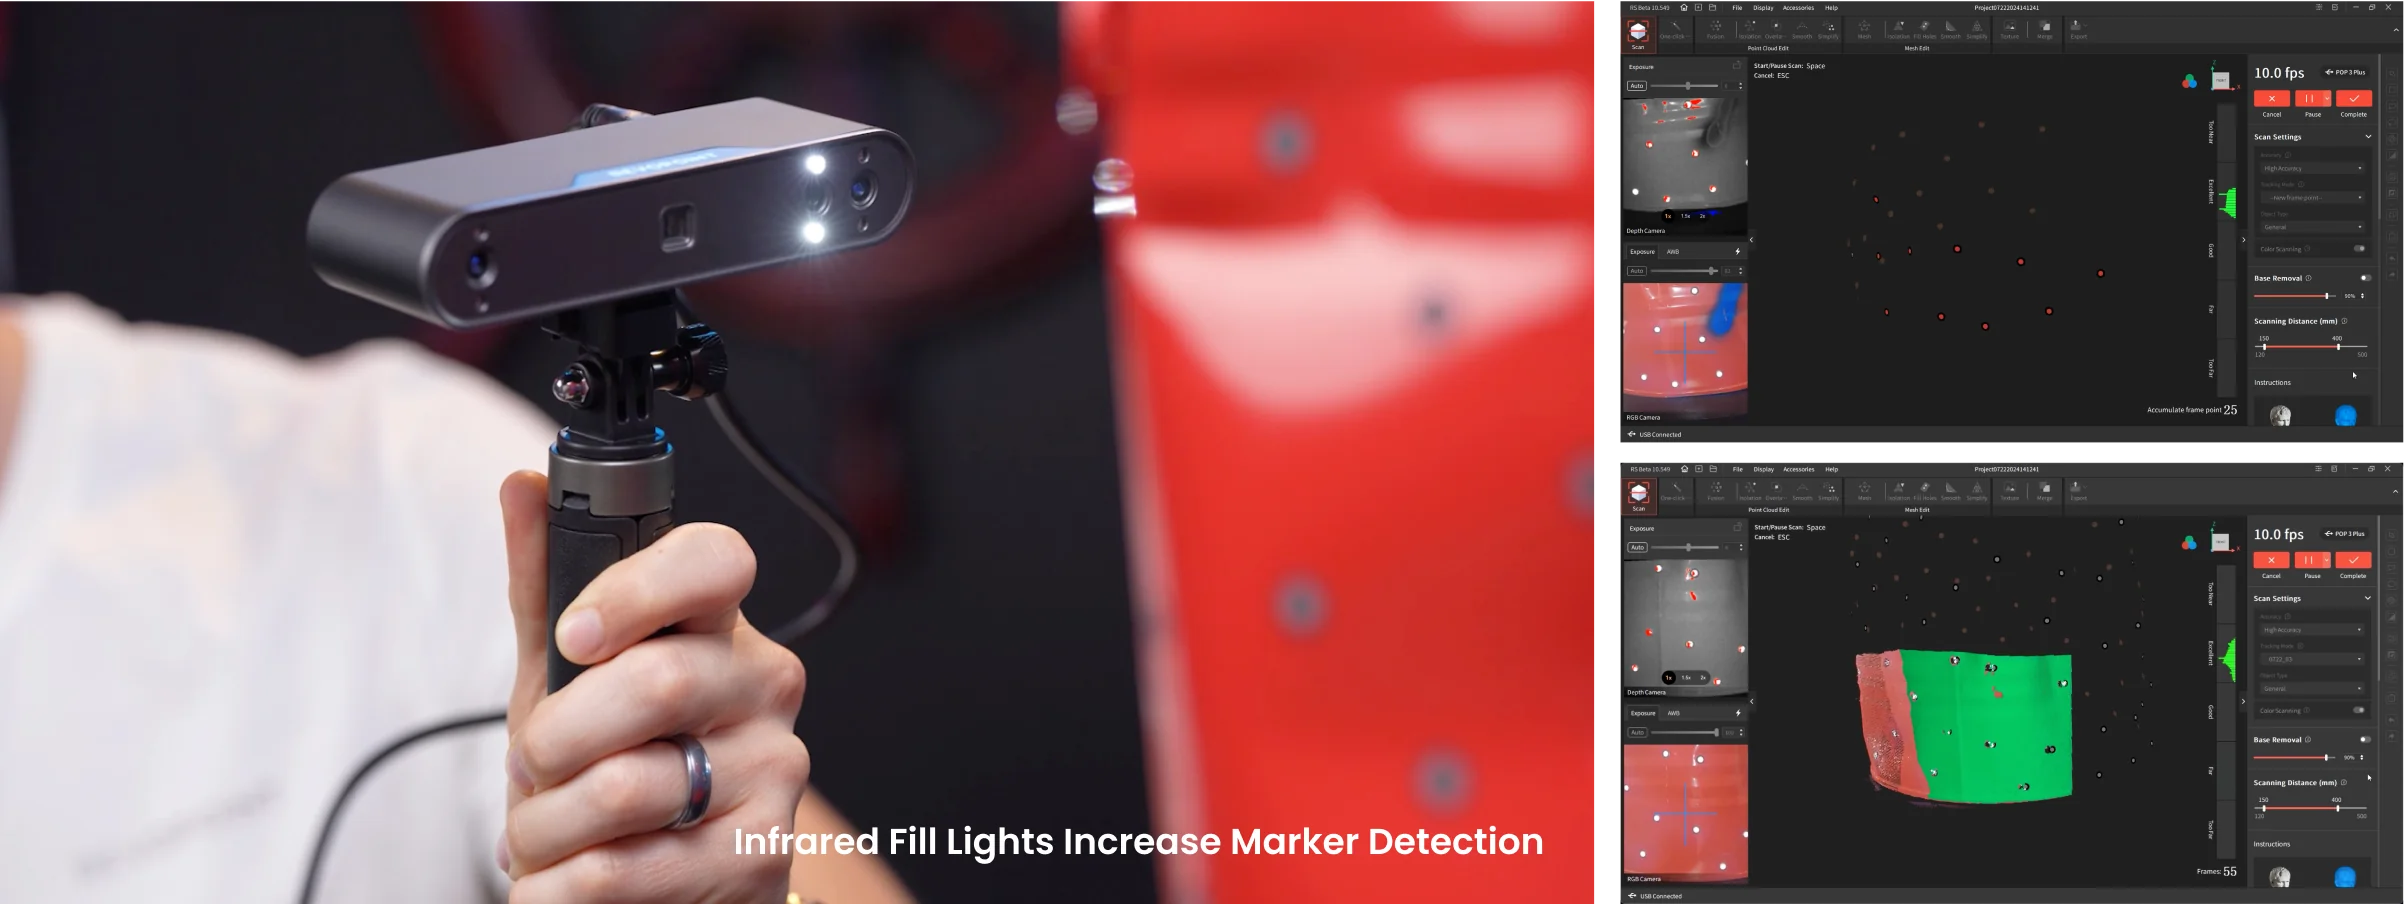
Better Marker Tracking
Global Marker Tracking Mode
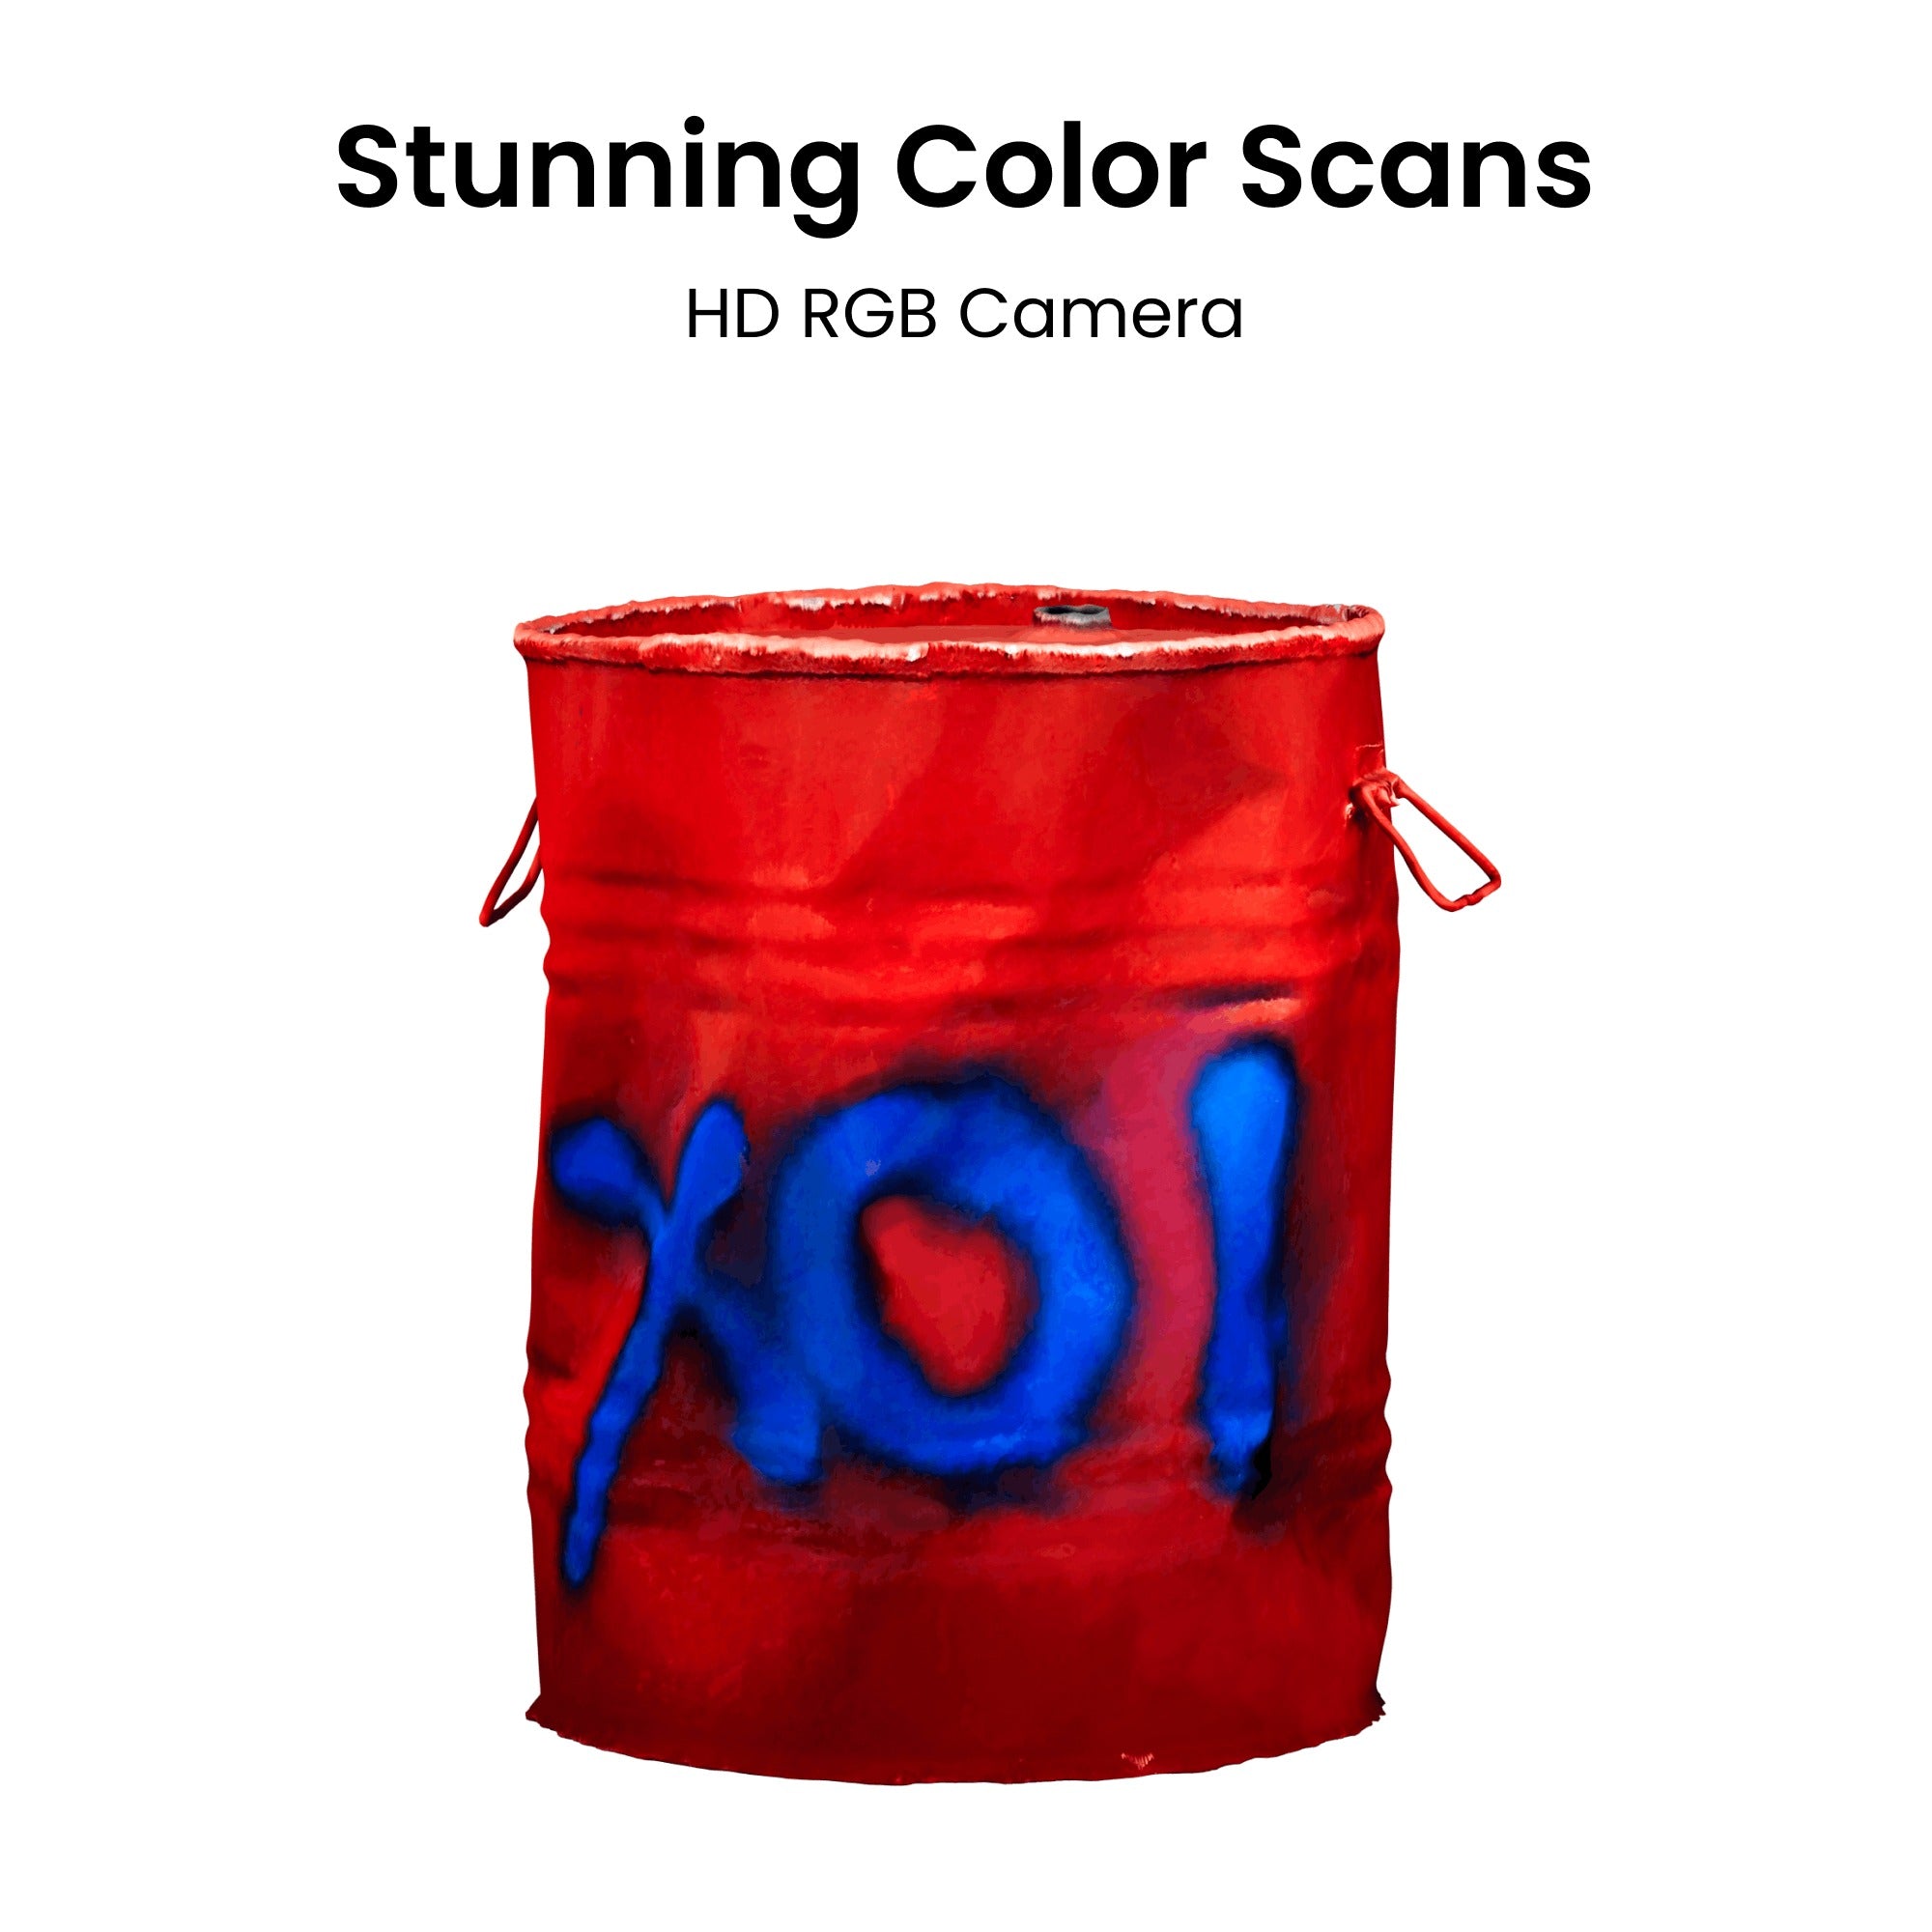
Full-color 3D Models
HD RGB Camera
Flash LEDs Ensure Accurate Color Capture

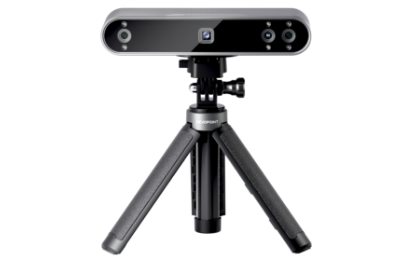
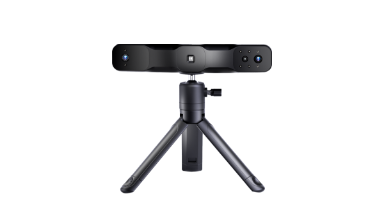
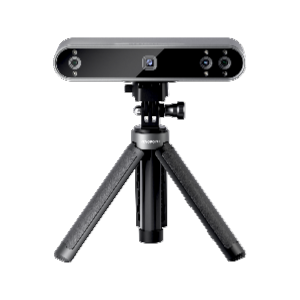
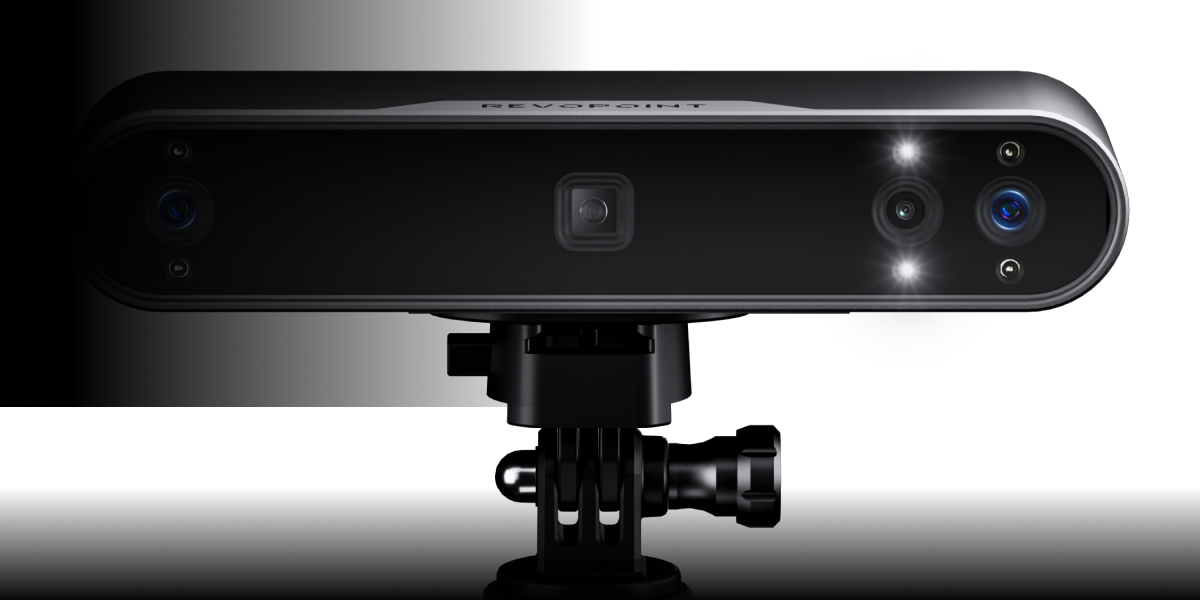
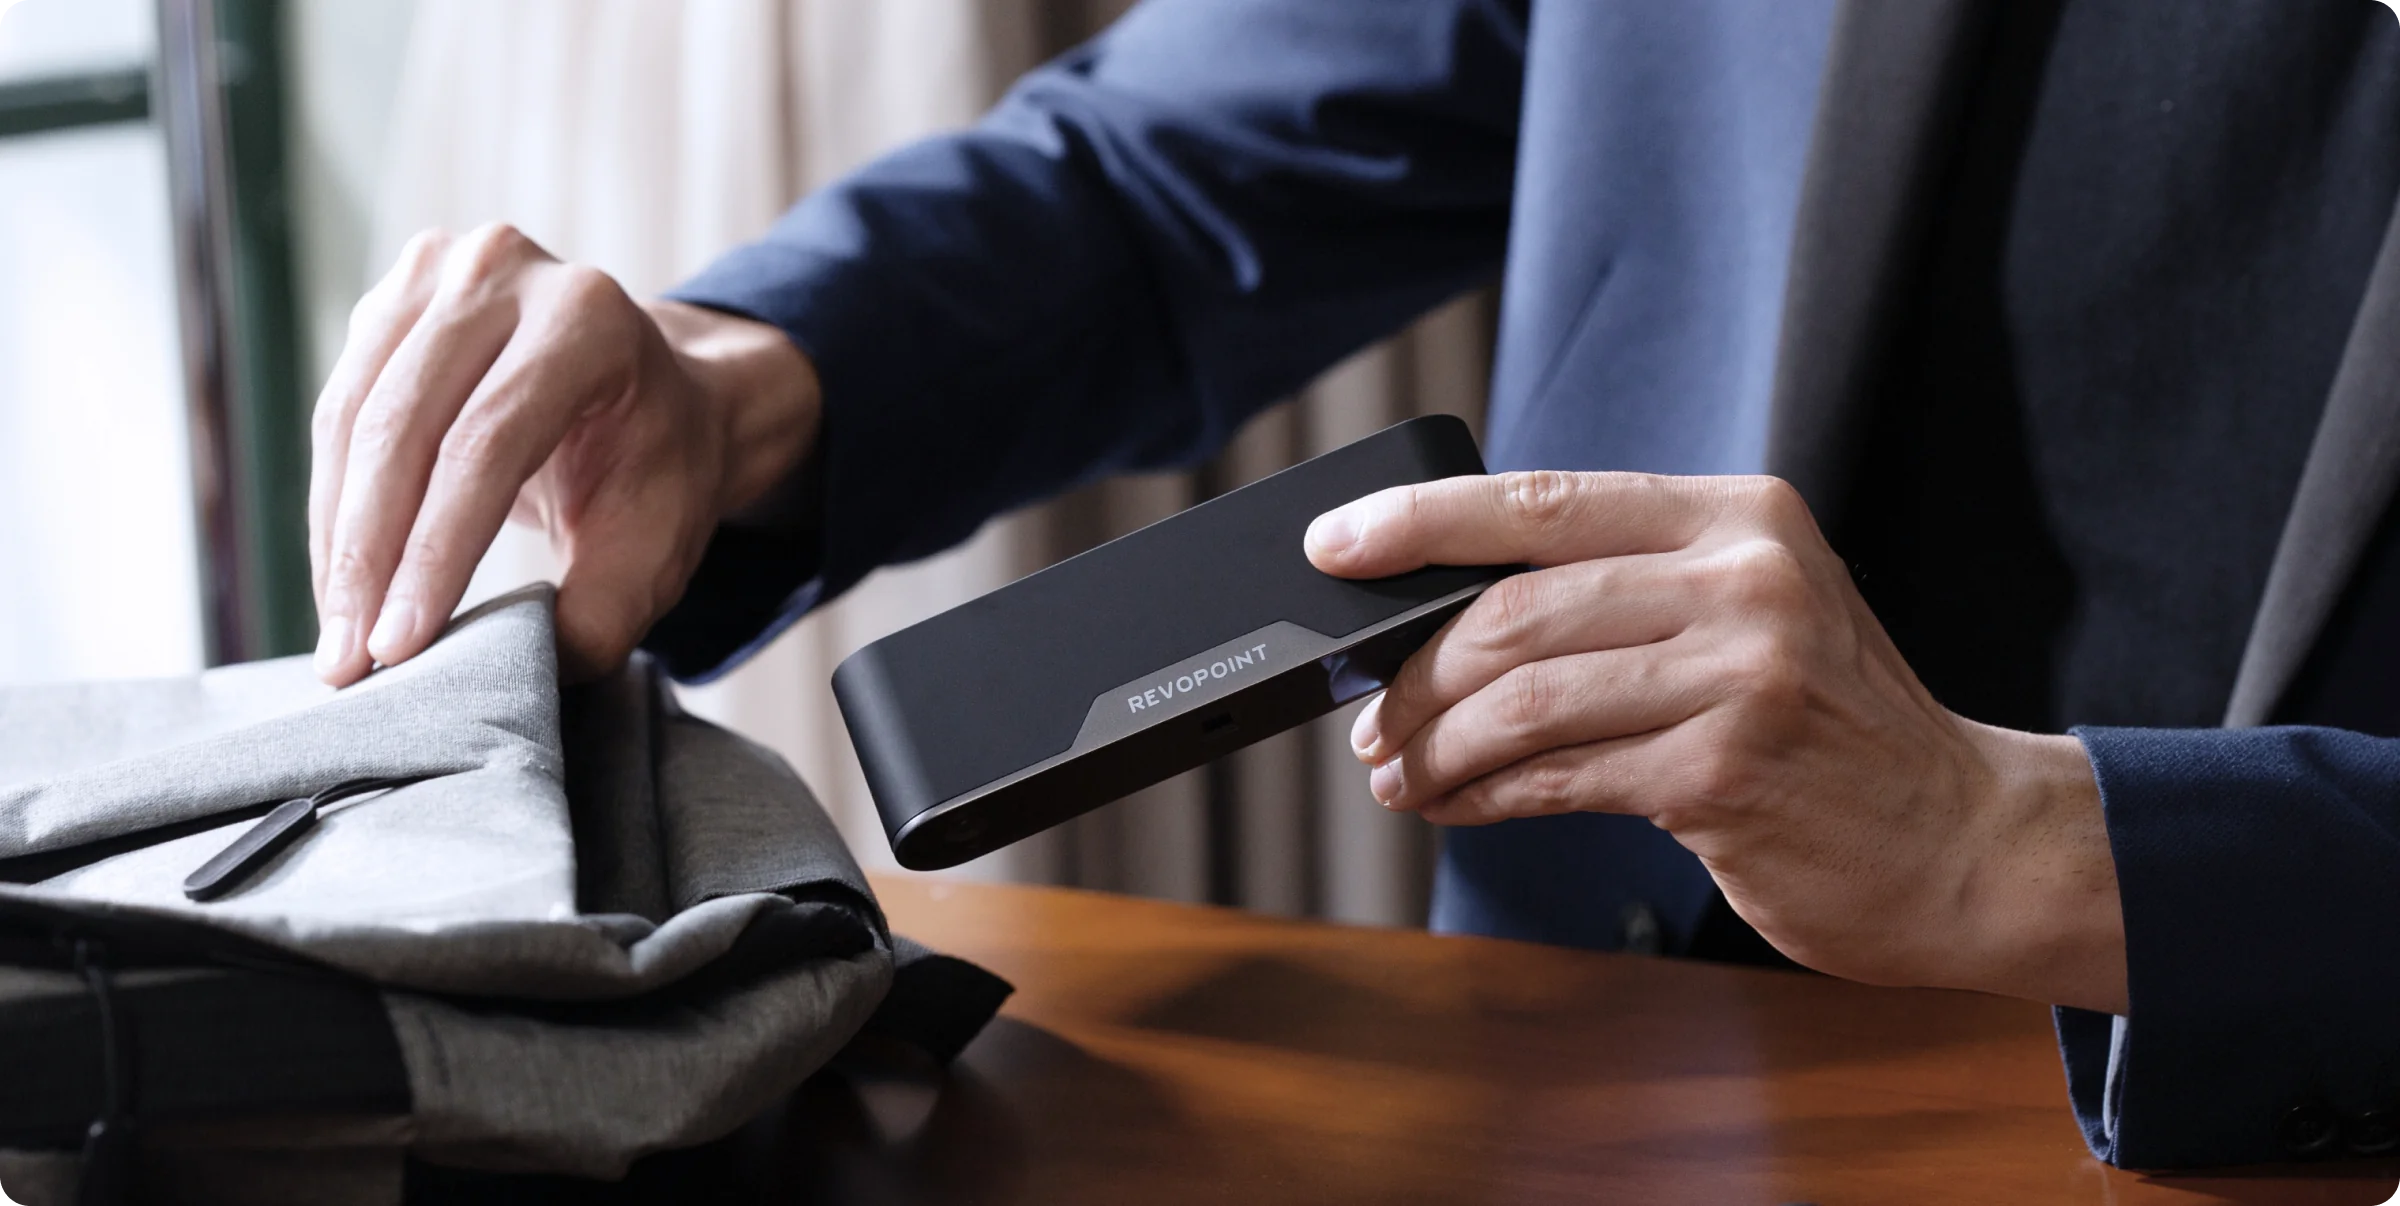
Portable and Compact
Scanner Weighs Only 190 g
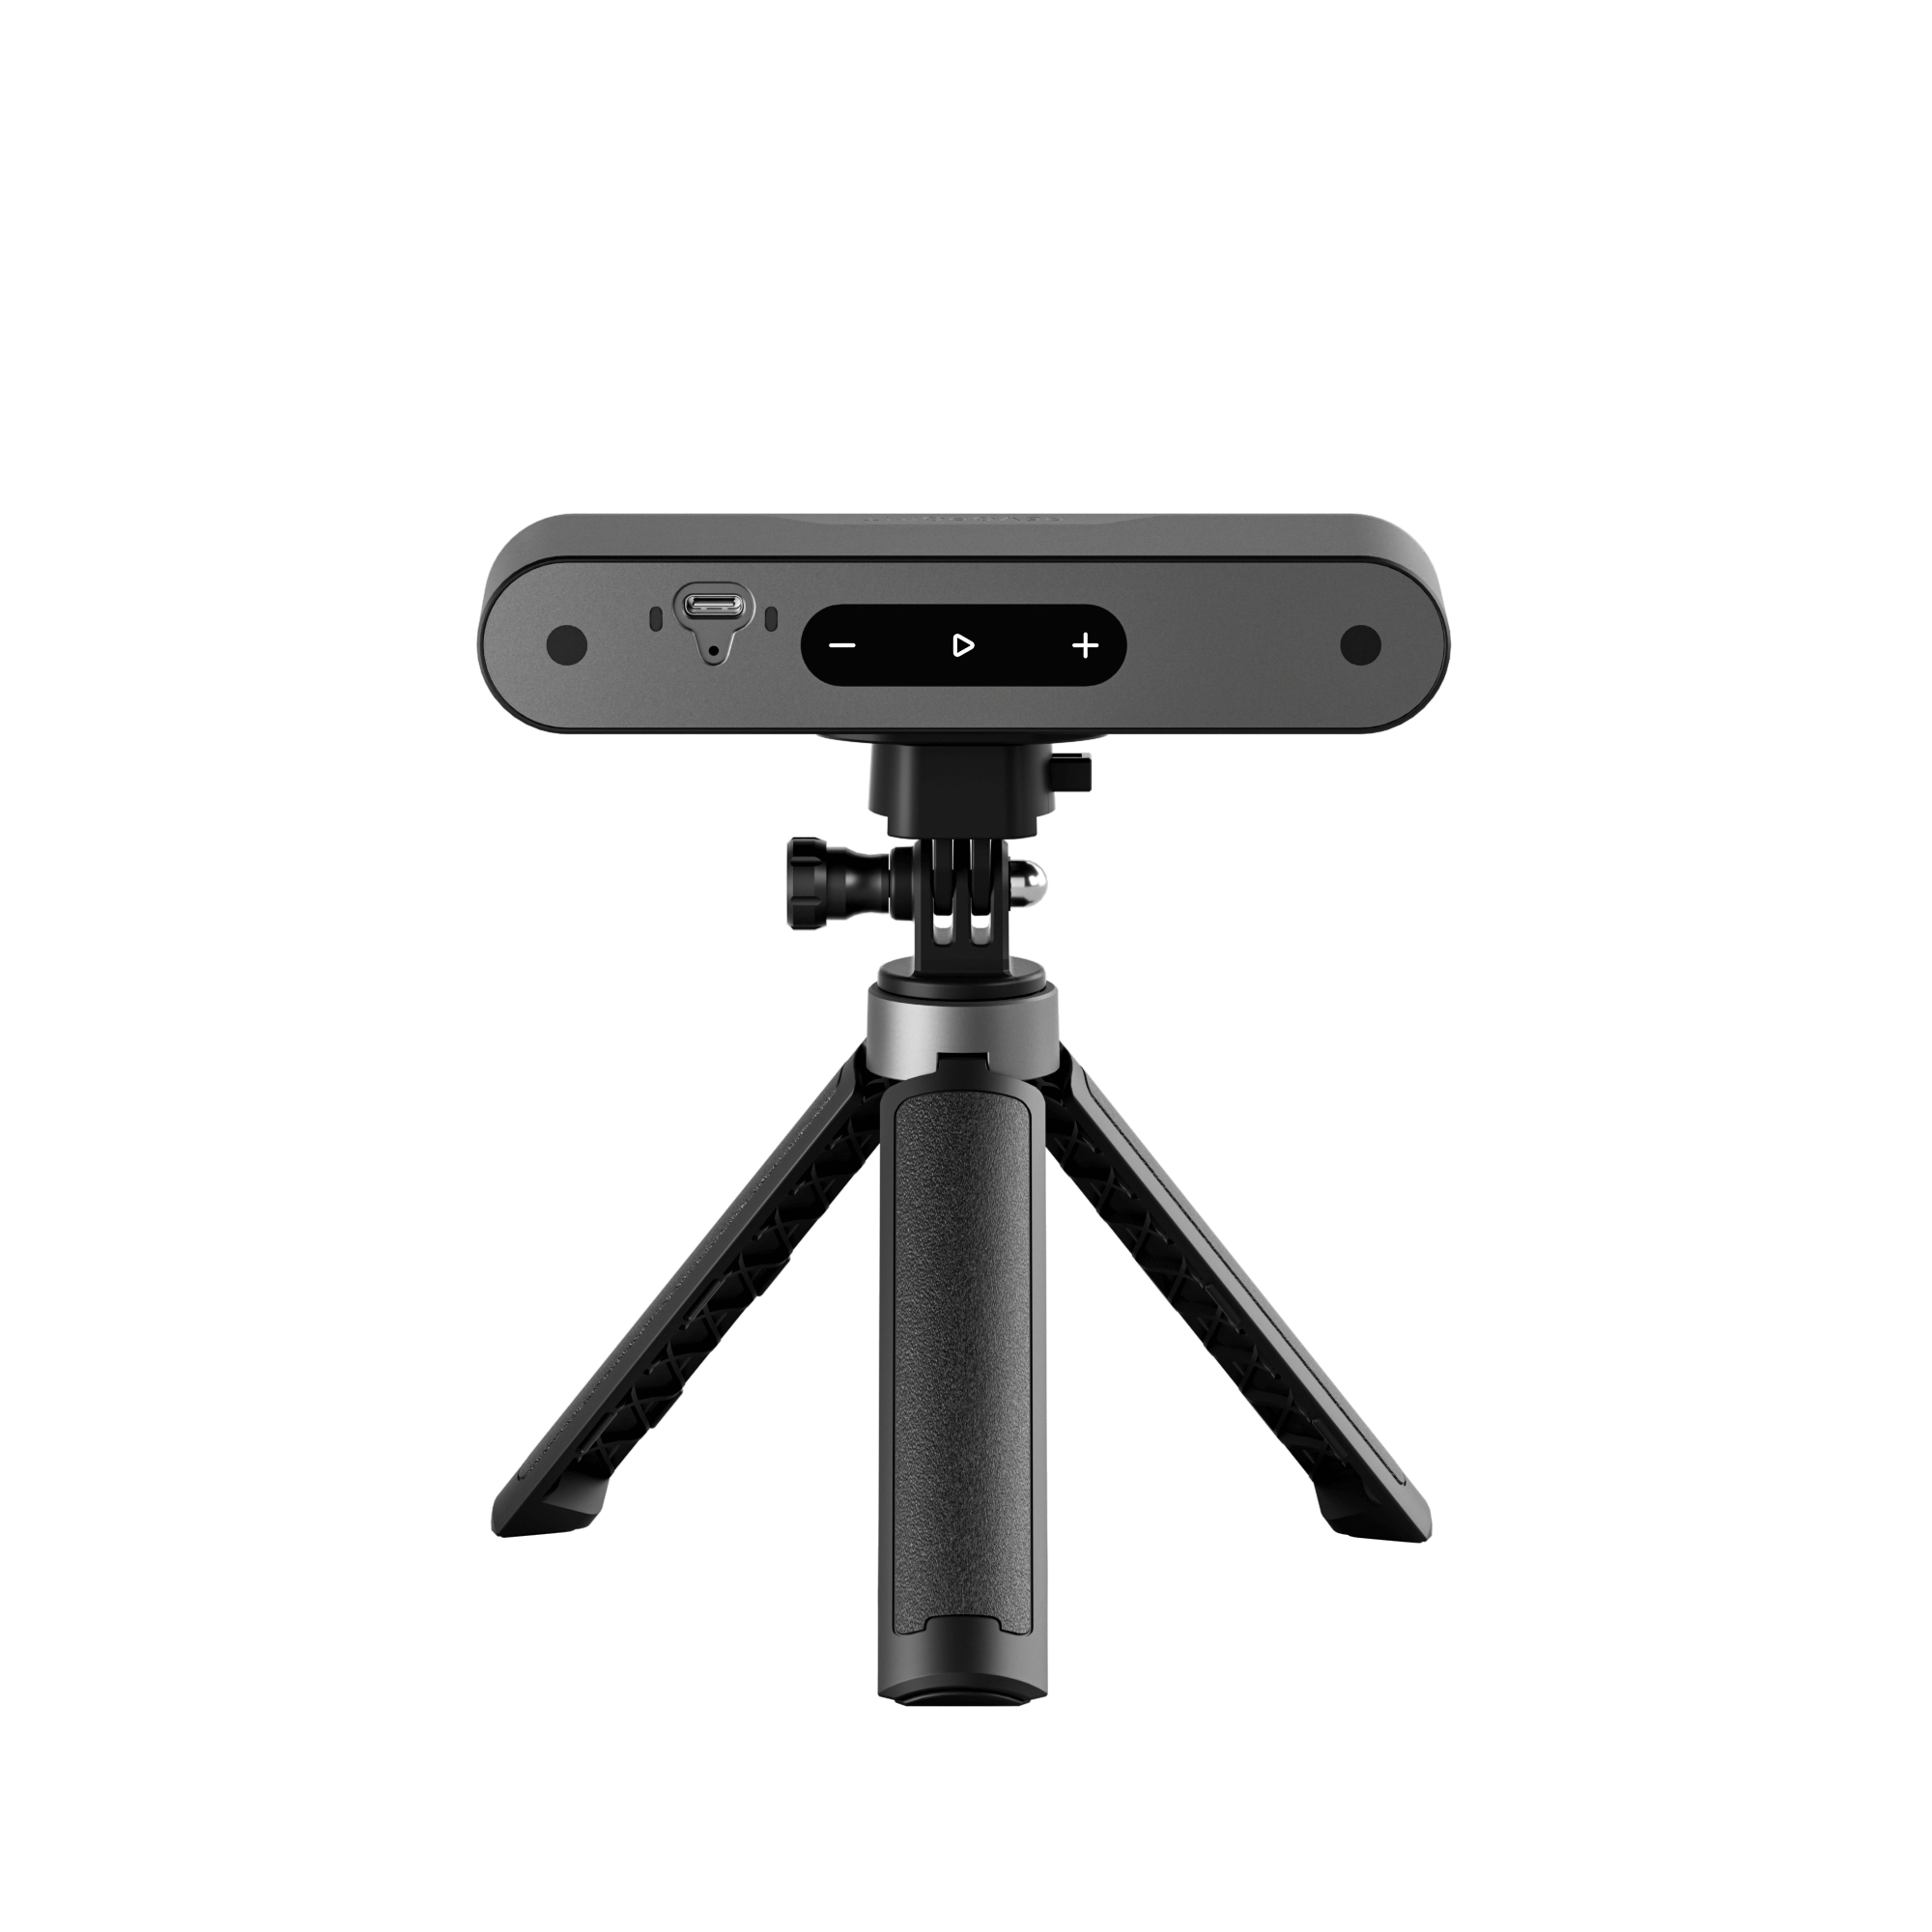
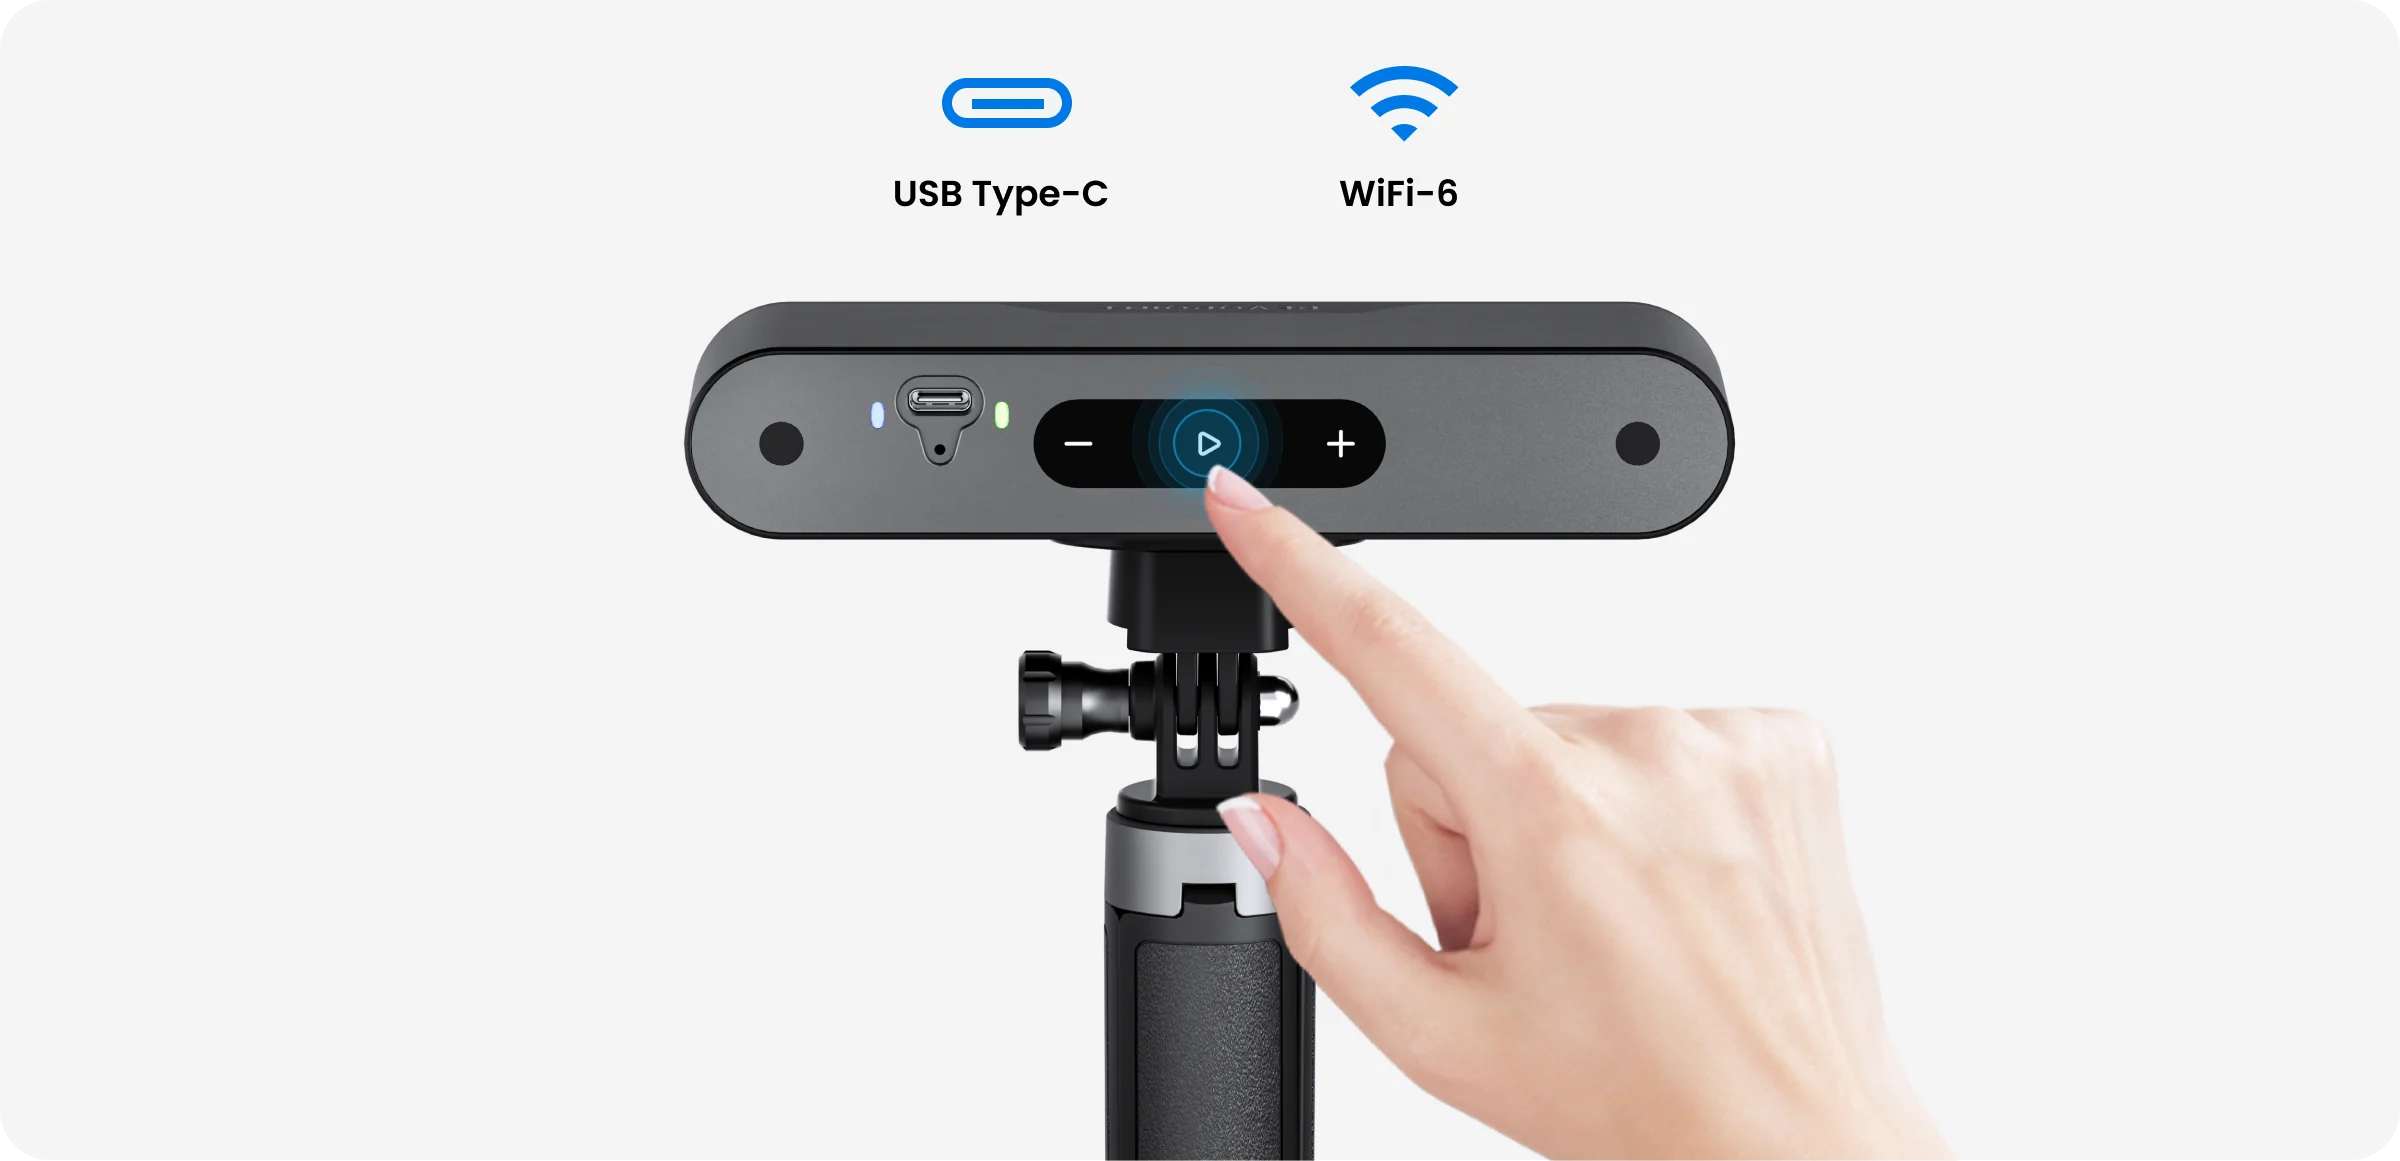
Responsive Controls
Decrease Exposure | Start/Pause Scans | Increase Exposure
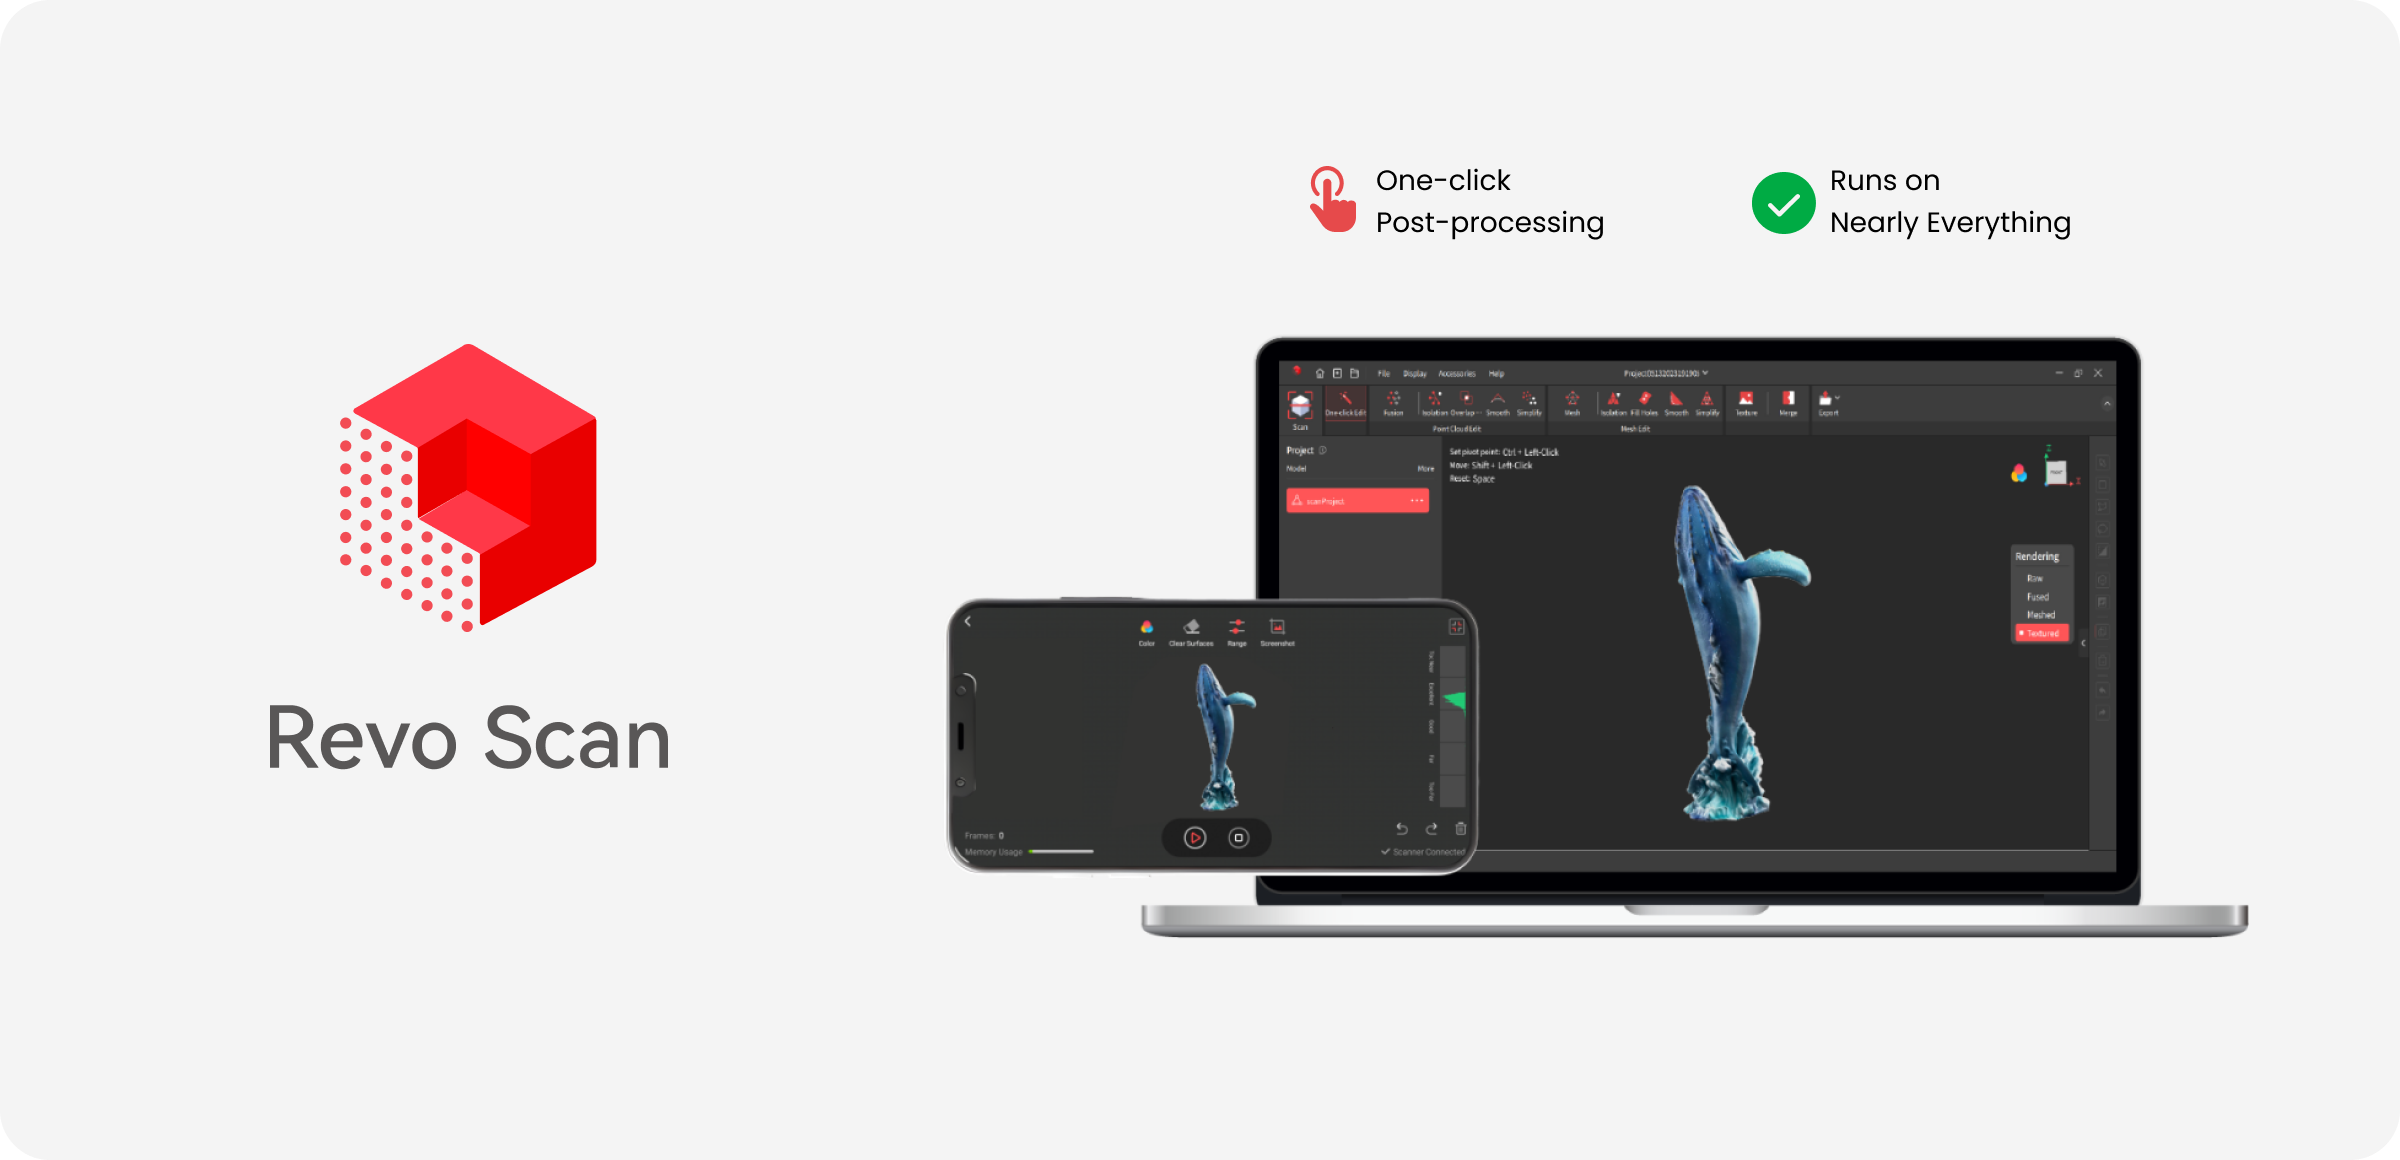
Powerful Software
Compatible with iOS, Android, Windows, and macOS devices.
Supports STL, PLY, OBJ, ASC, 3MF, GLTF, and FBX file formats for compatibility
with most CAD, 3D modeling, and slicer software.
View more >
Models Made With POP 3 Plus
Click to Explore

Specifications
Product Name
POP 3 Plus 3D Scanner
Technology
Dual-camera Infrared Structured Light
Single-frame Accuracy, up to
0.08 mm
Single-frame Precision, up to
0.04 mm
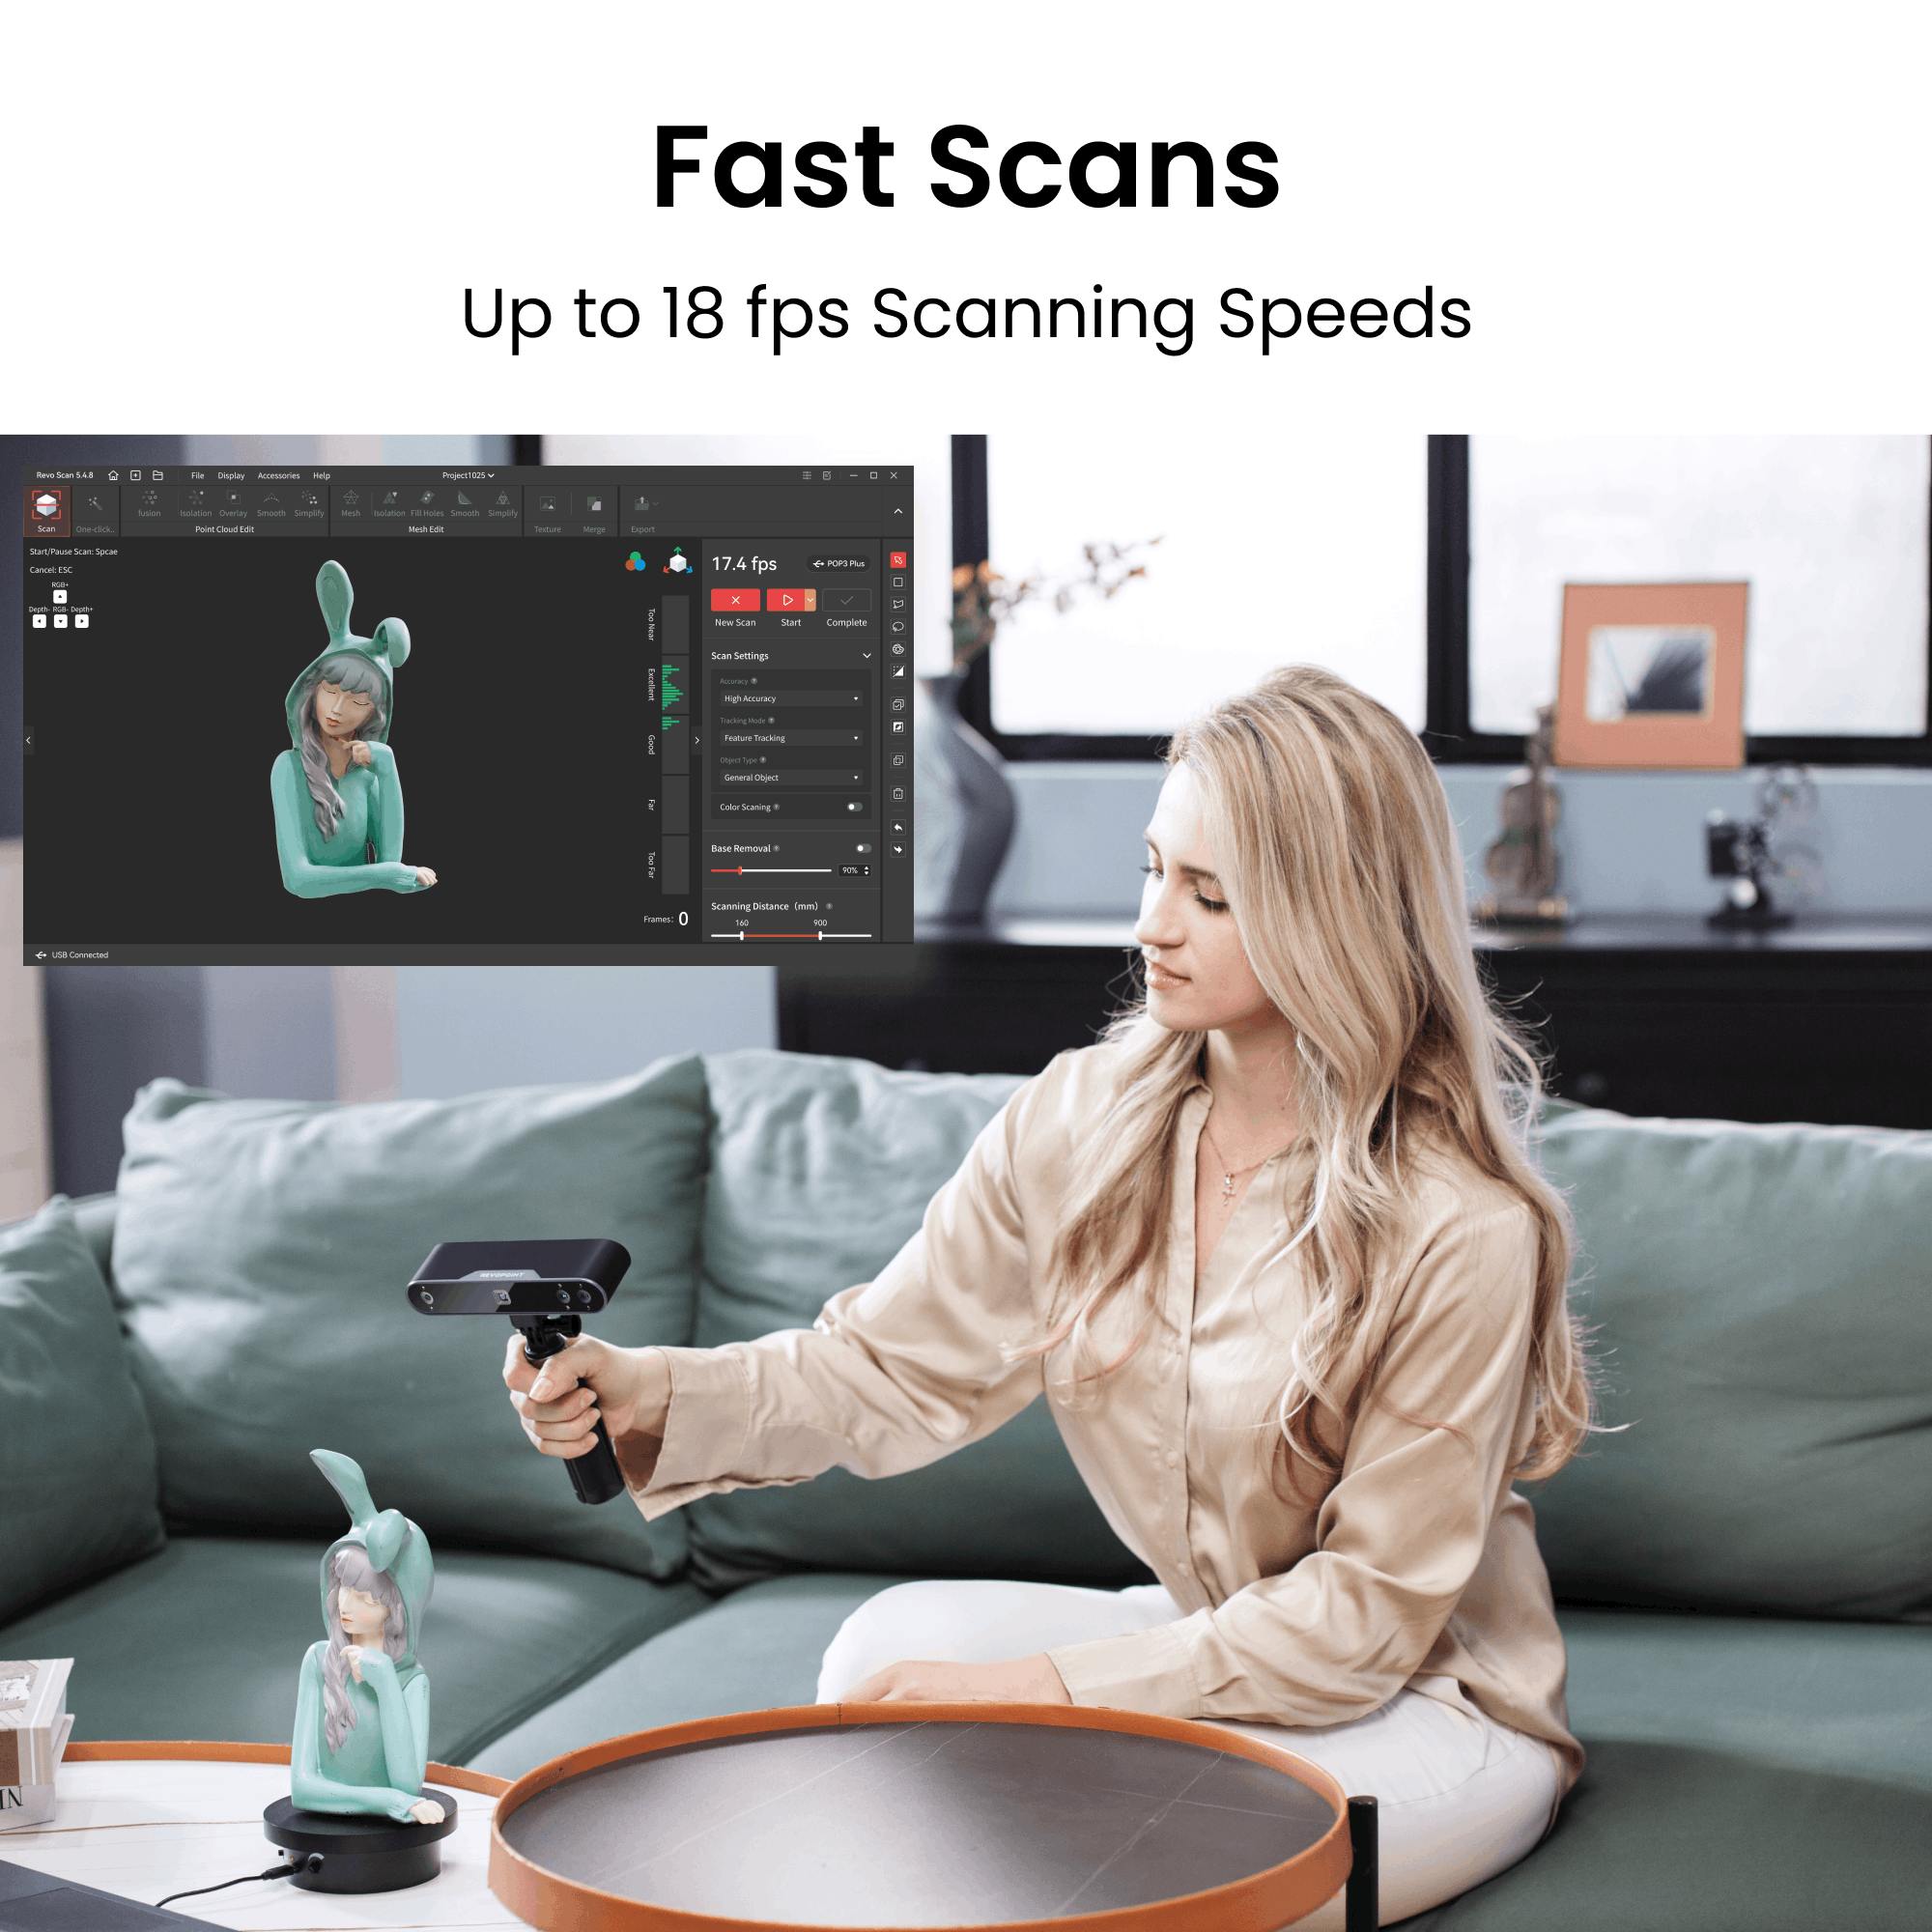
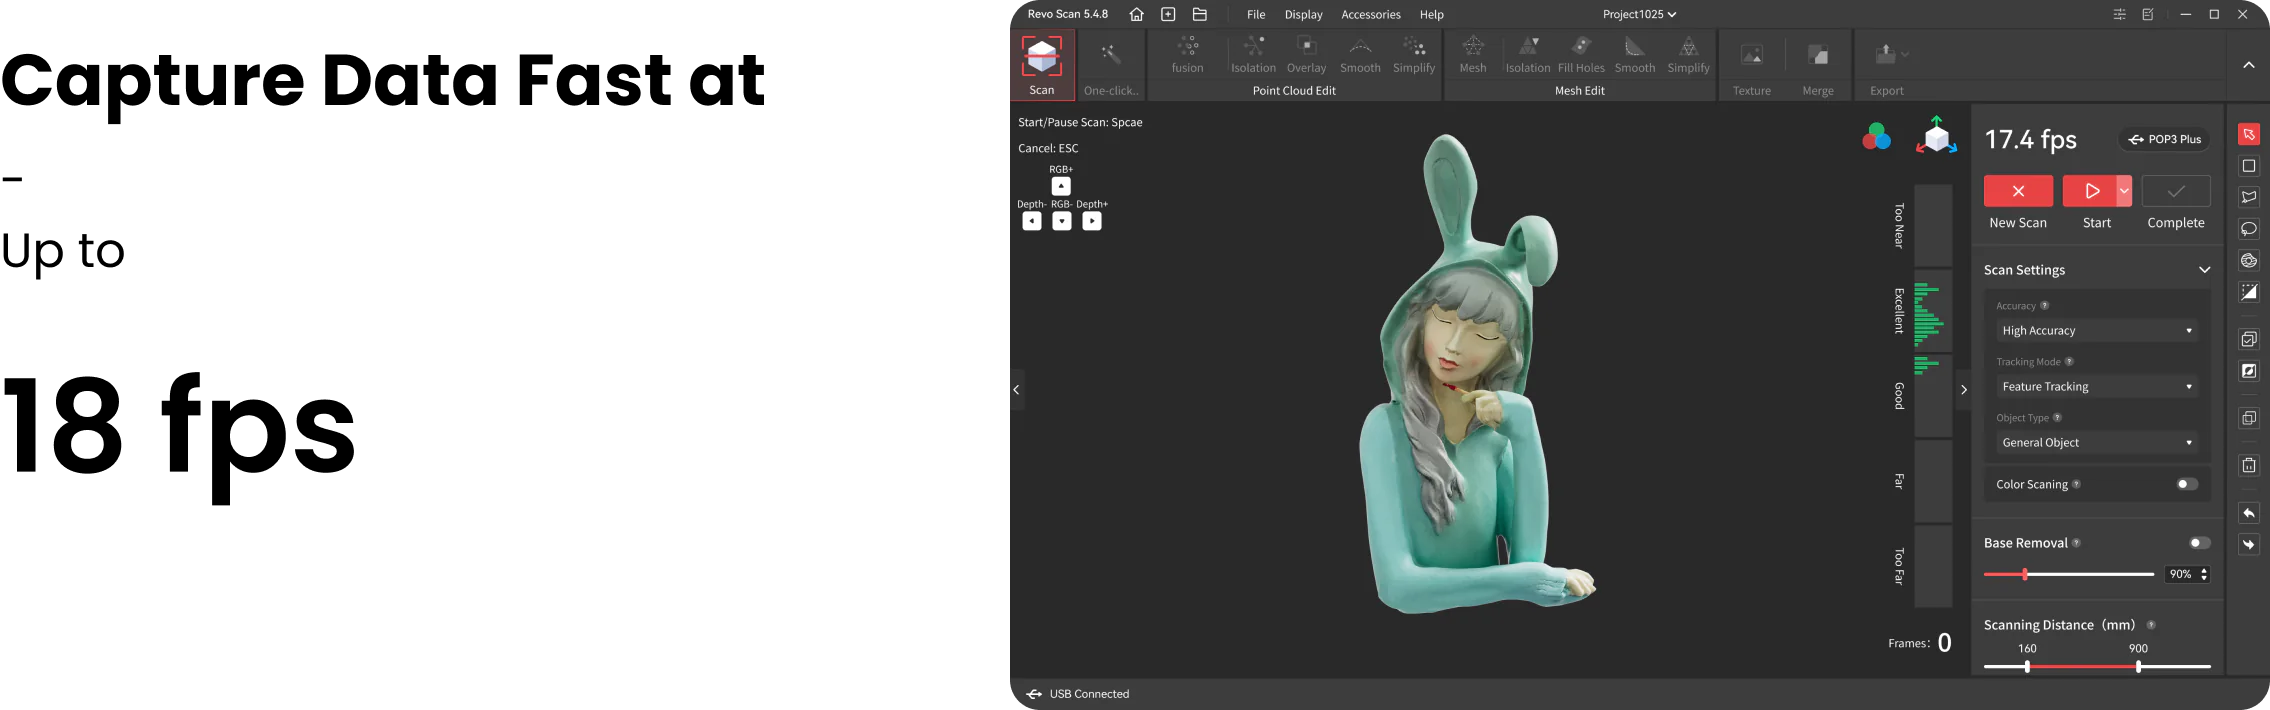
Scanning Speed,up to
18 fps
Fused Point Distance, up to
0.05 mm
Single Capture Area at Nearest Distance
61 x 68 mm at 150 mm
Single Capture Area at Furthest Distance
244 x 180 mm at 400 mm
Scanning Type
Handheld and Desktop
Working Distance
150 ~ 400 mm
Minimum Scan Volume
20 x 20 x 20 mm
Maxmium Scan Volume
2 x 2 x 2 m
Auxiliary Lighting
Infrared Fill Lights, White Flash LEDs
Angular Field of View, H x W
40 x 25°
CPU
2 core, 1.6GHz
Position Sensors
9-axis IMU
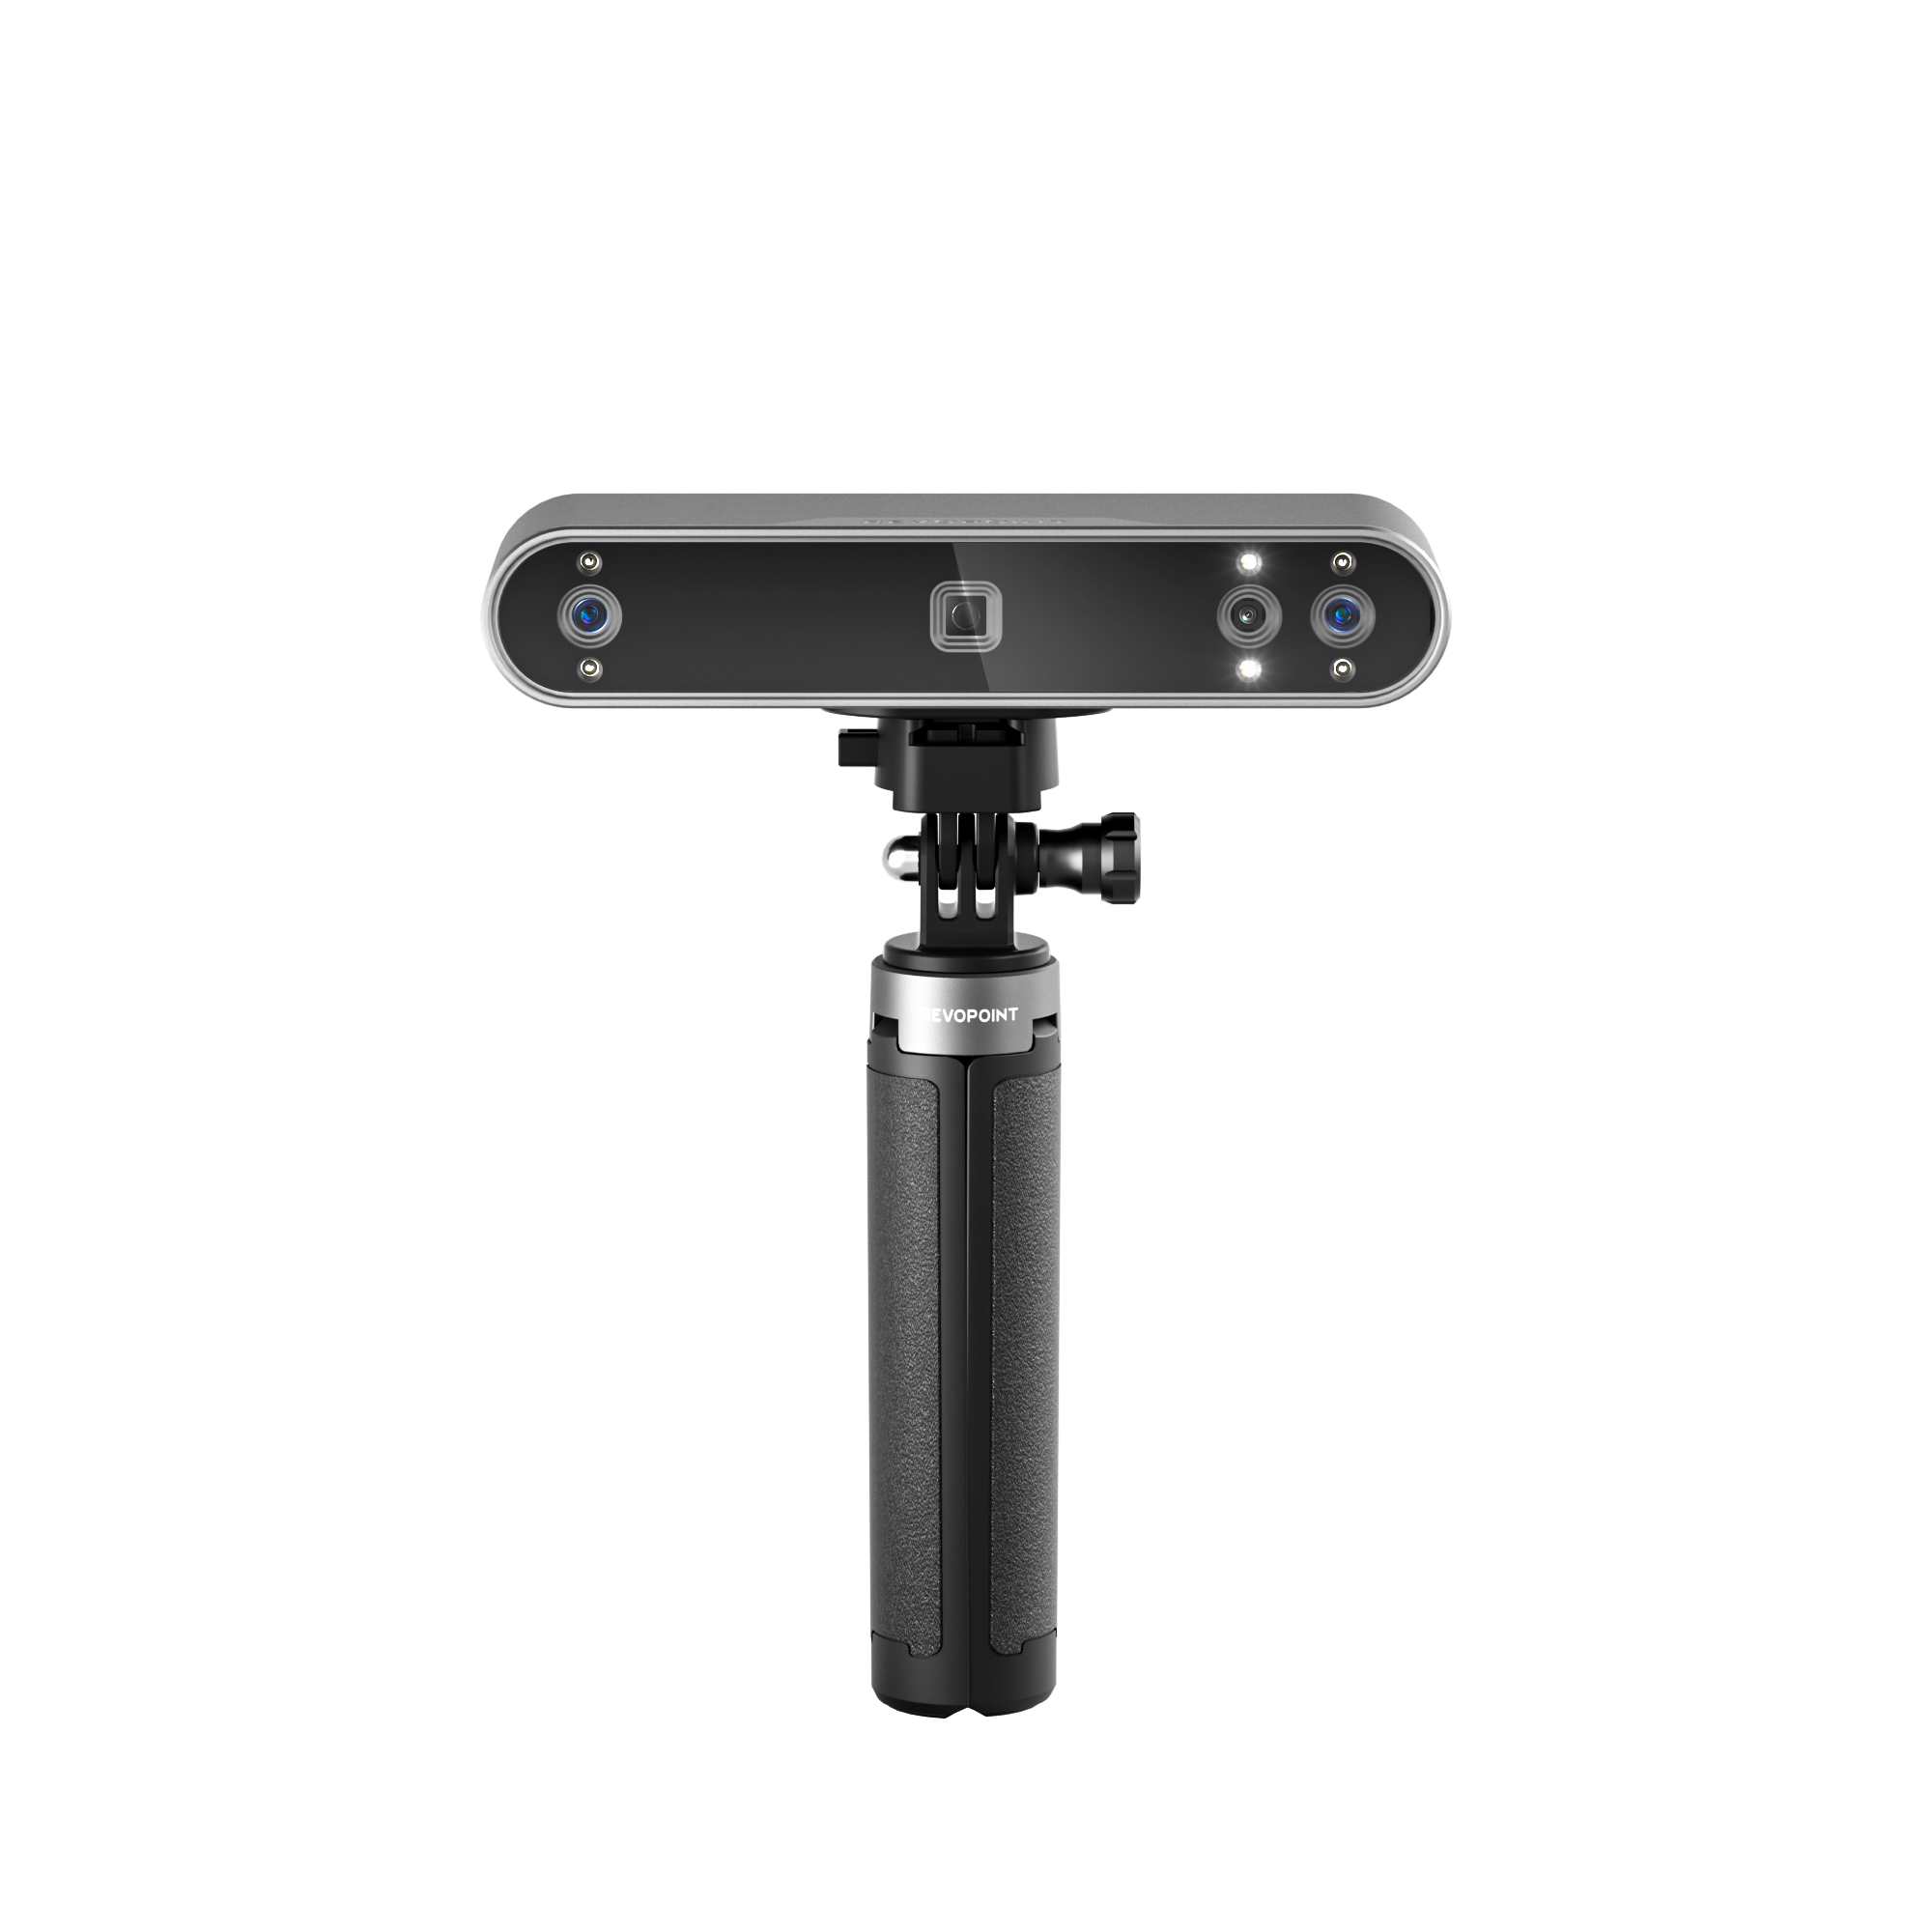
Scanner Weight
190 g
Dimensions(L x W x H)
153 x 45 x 29 mm
Tracking Methods
Feature , Marker
Buttons
3
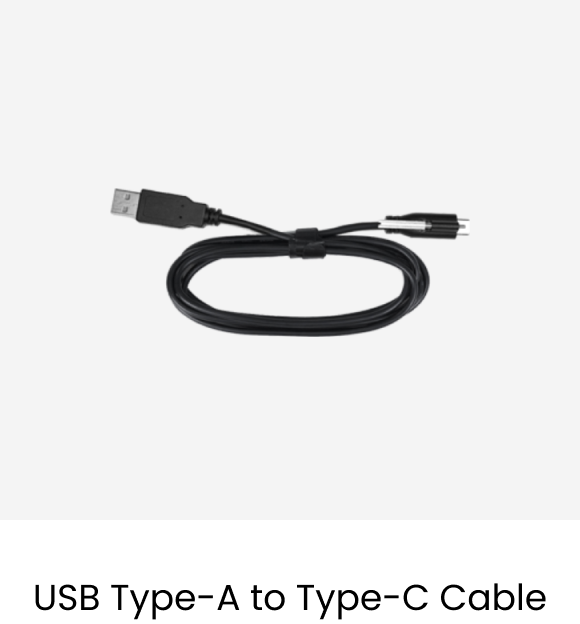
Connector Type
USB Type-C
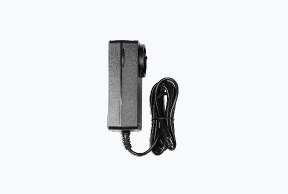
Power Requirements
DC 5V, 1A
Wi-Fi
6
Bluetooth
4.1
Special Object Scanning
Use scanning spray for transparent, dark, or highly reflective objects
Scanning Environment
Indoors and Outdoors
Ready to Print 3D Models
Yes
Output File Formats
PLY, OBJ, STL, ASC, 3MF, GLTF, FBX
User Recalibration
Yes
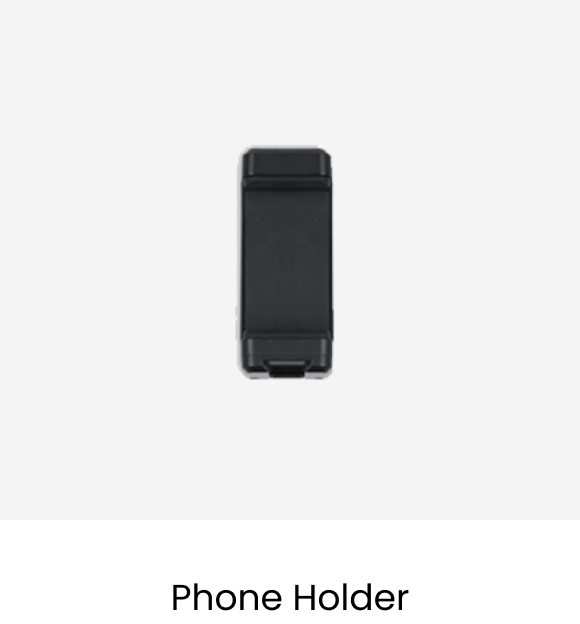
Supported Accessories
Large Turntable, Dual-axis Turntable, Handheld Stabilizer, Power Bank, Mobile Kit
Compatible Systems
Windows 10/11(64-bit), Android, iOS, macOS
Light Type
Class 1 Infrared Light (Eye Safe)
macOS 11.0 or better
Minimum Requirements
CPU M1 Pro or better
RAM ≥8GB
Connection:
Thunderbolt 4 or better, or Wi-Fi
Recommended Requirements
CPU M1 Pro or better
RAM ≥16GB
Connection: Thunderbolt 4 or better, or Wi-Fi
Windows 10/11 (64 bit)
Minimum Requirements
CPU i5 12th gen or better
RAM ≥16GB
Connection:
USB 3.0 port or better, or Wi-Fi
Recommended Requirements
CPU Intel Core i7 or better
RAM ≥16GB
Connection: USB 3.0 port or better, or Wi-Fi
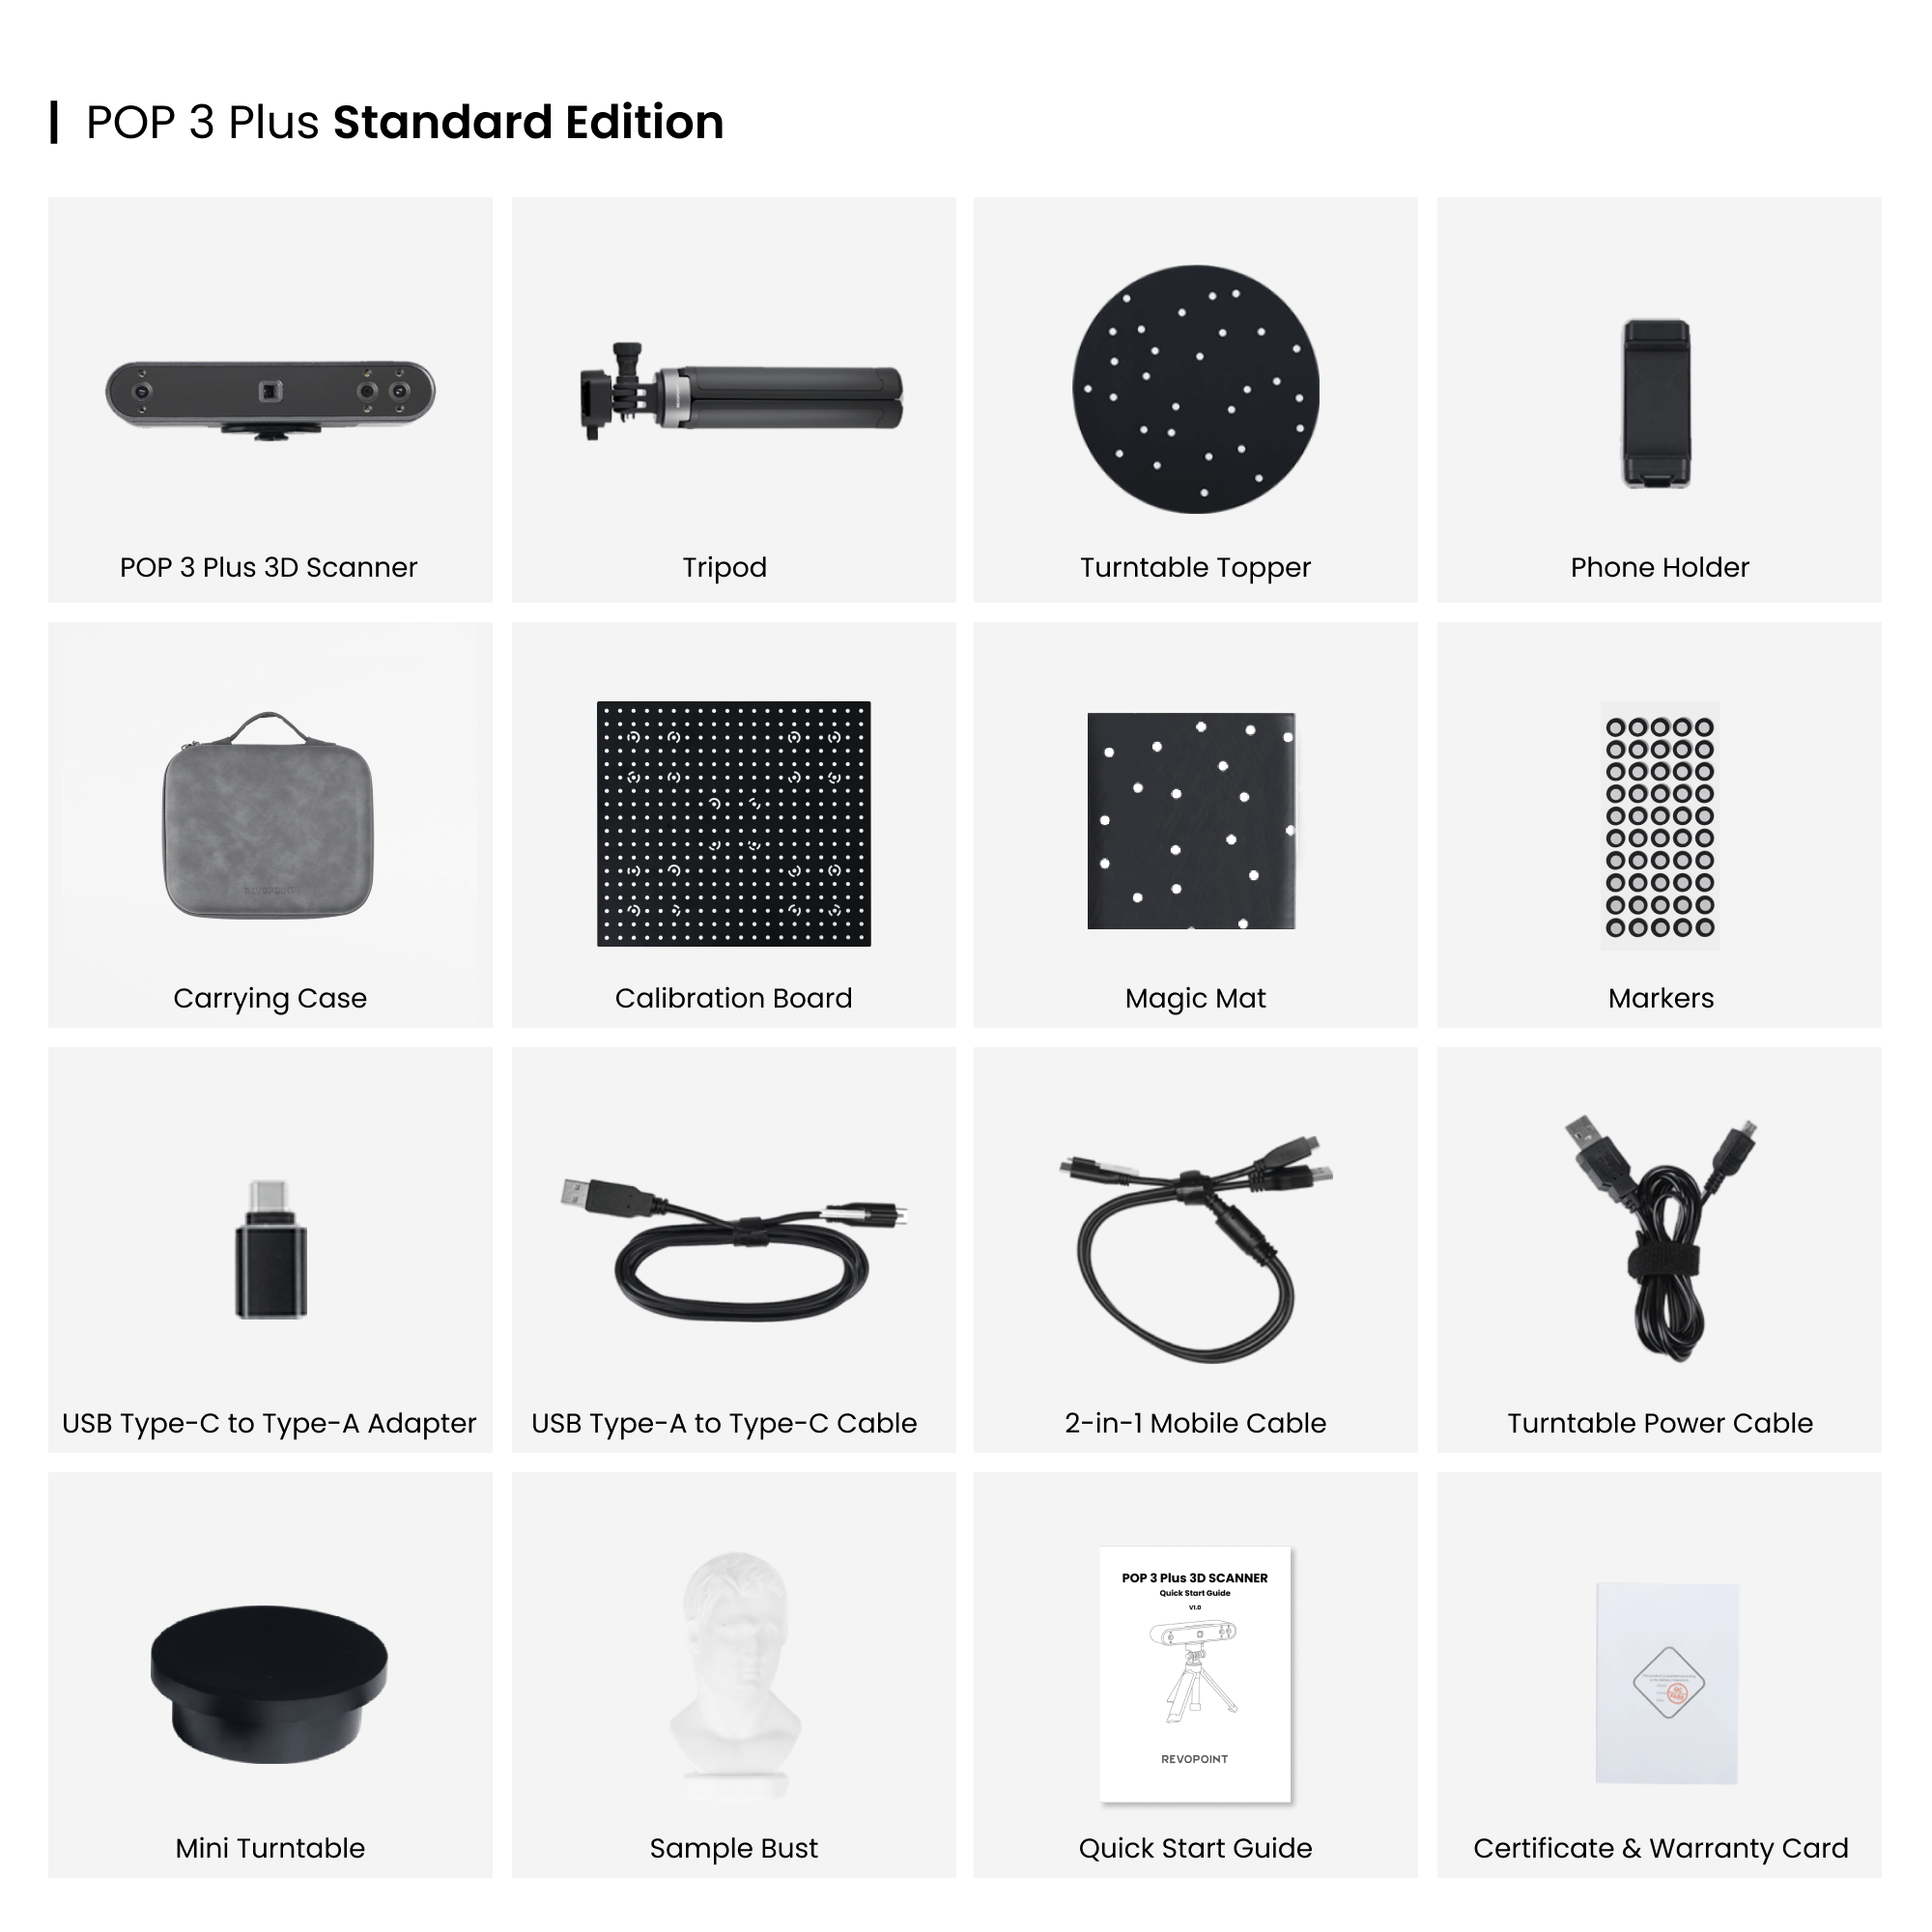
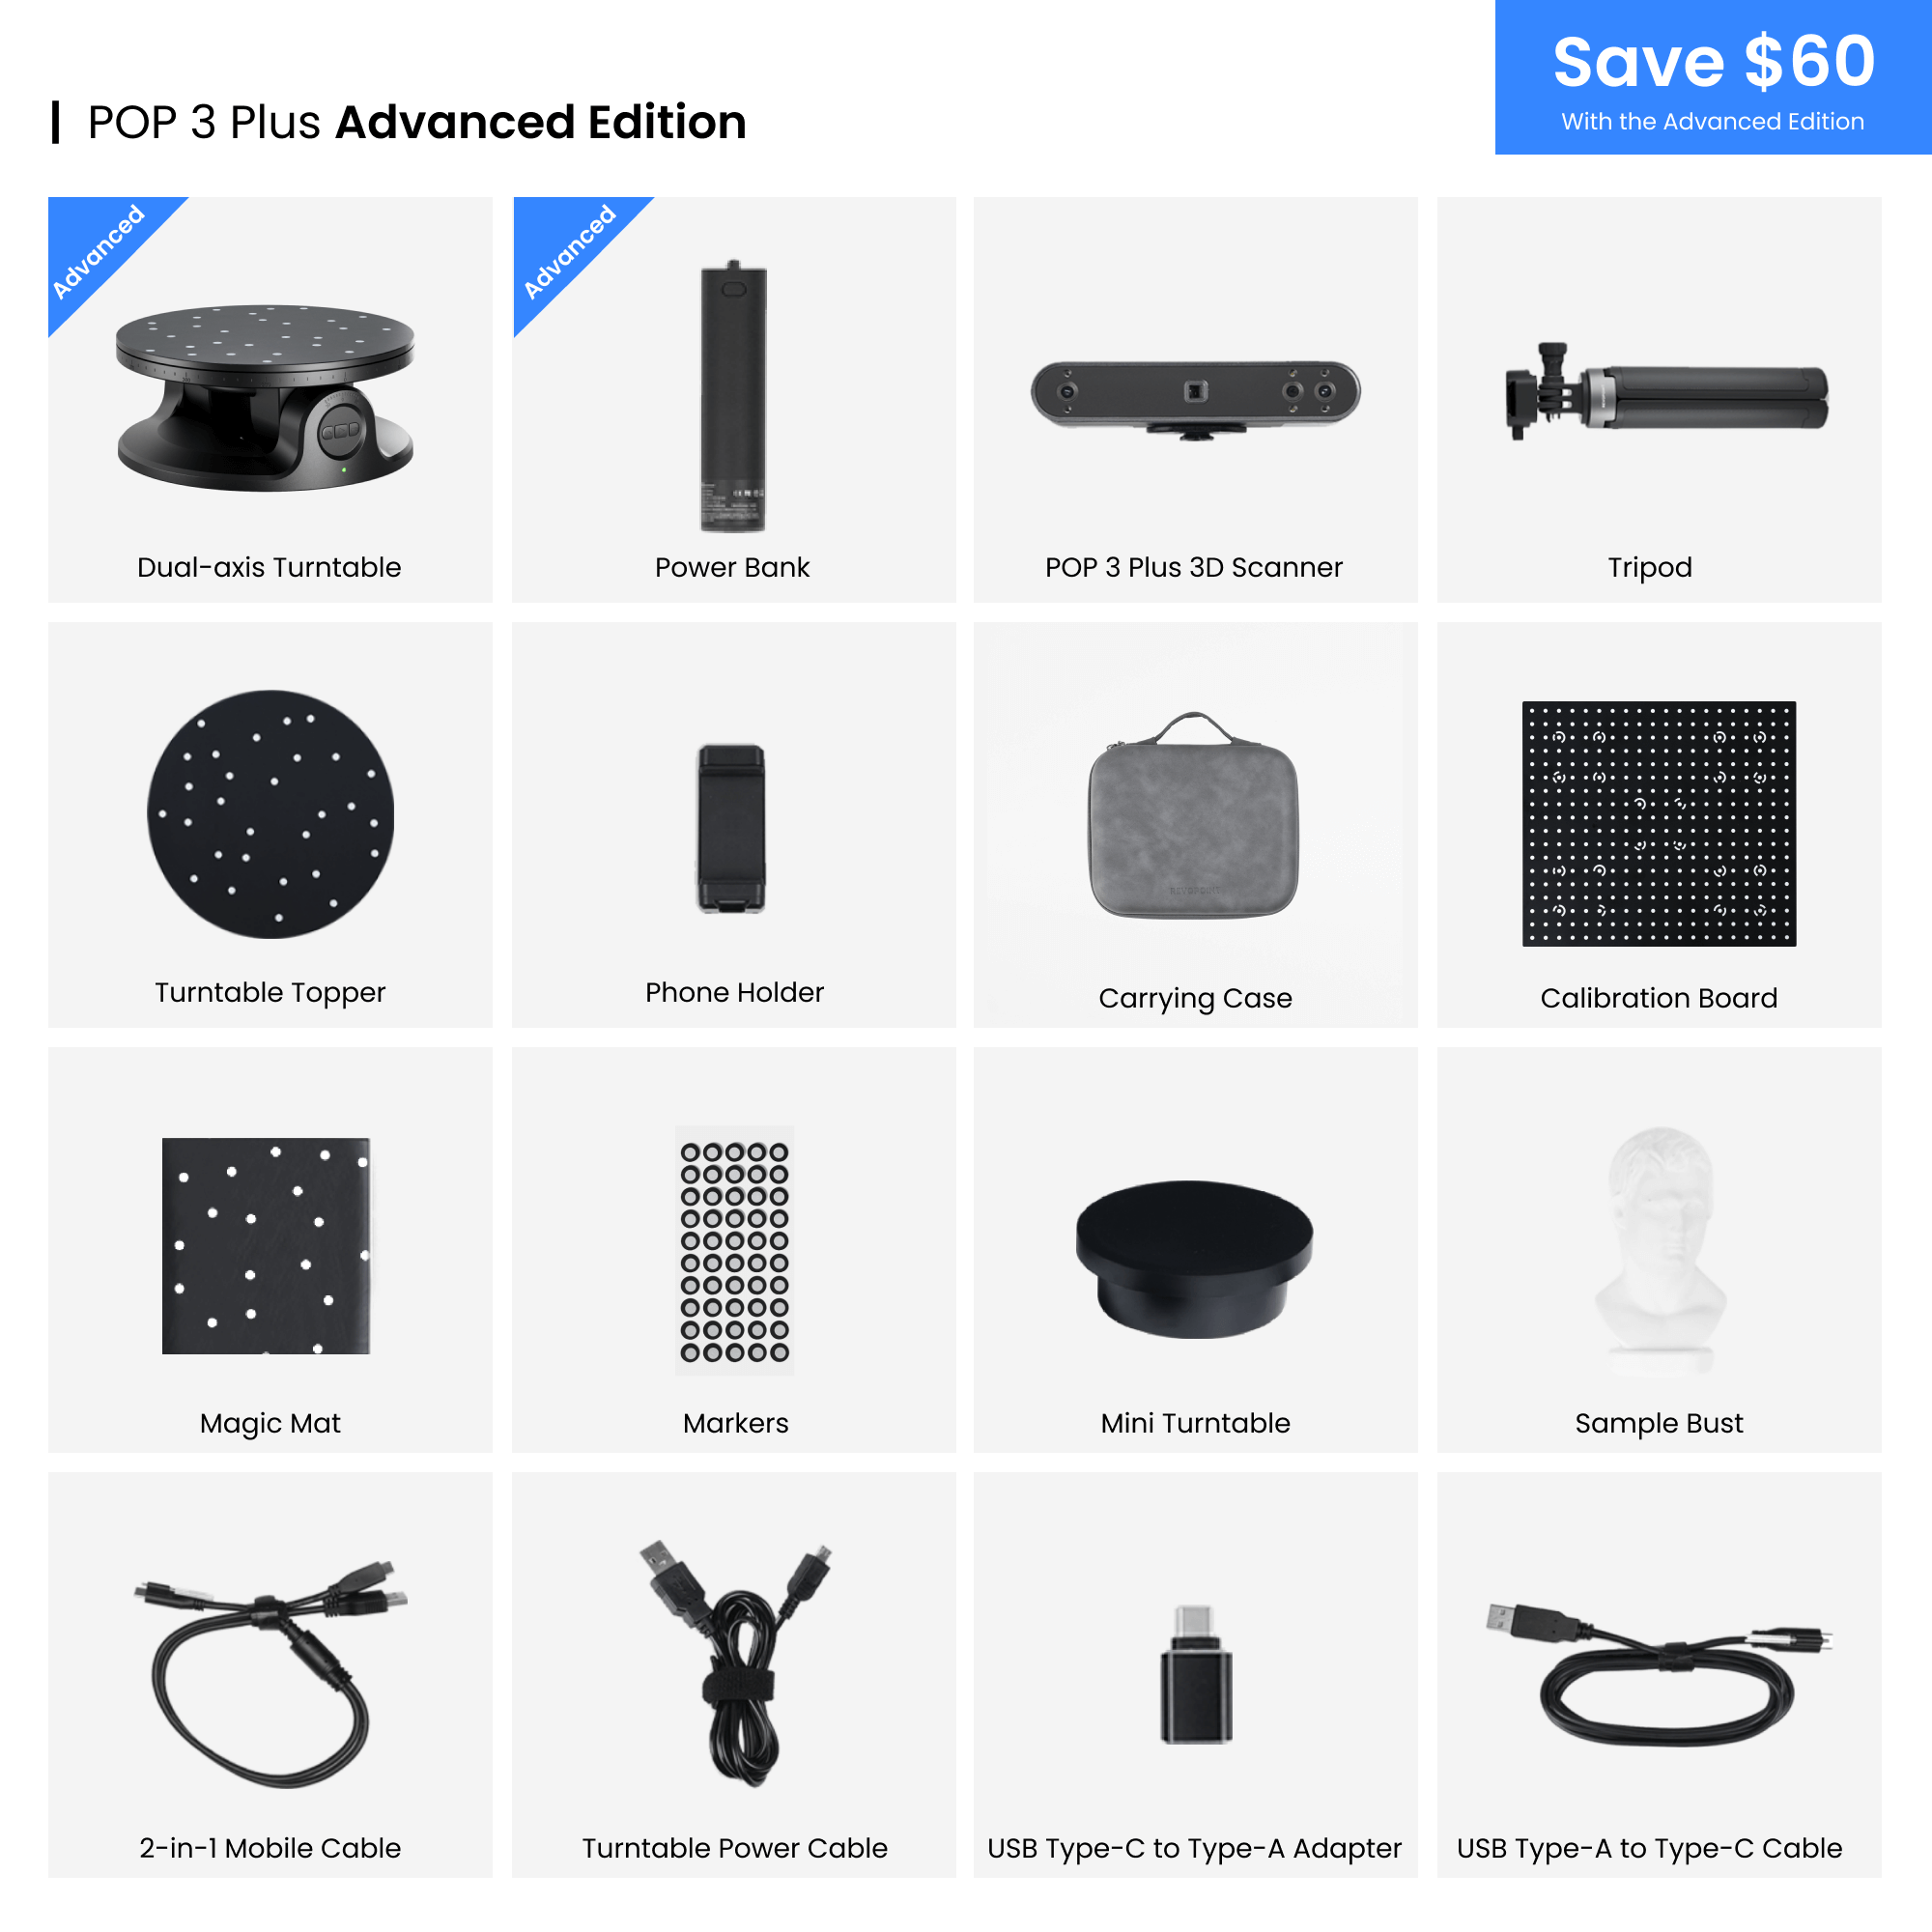
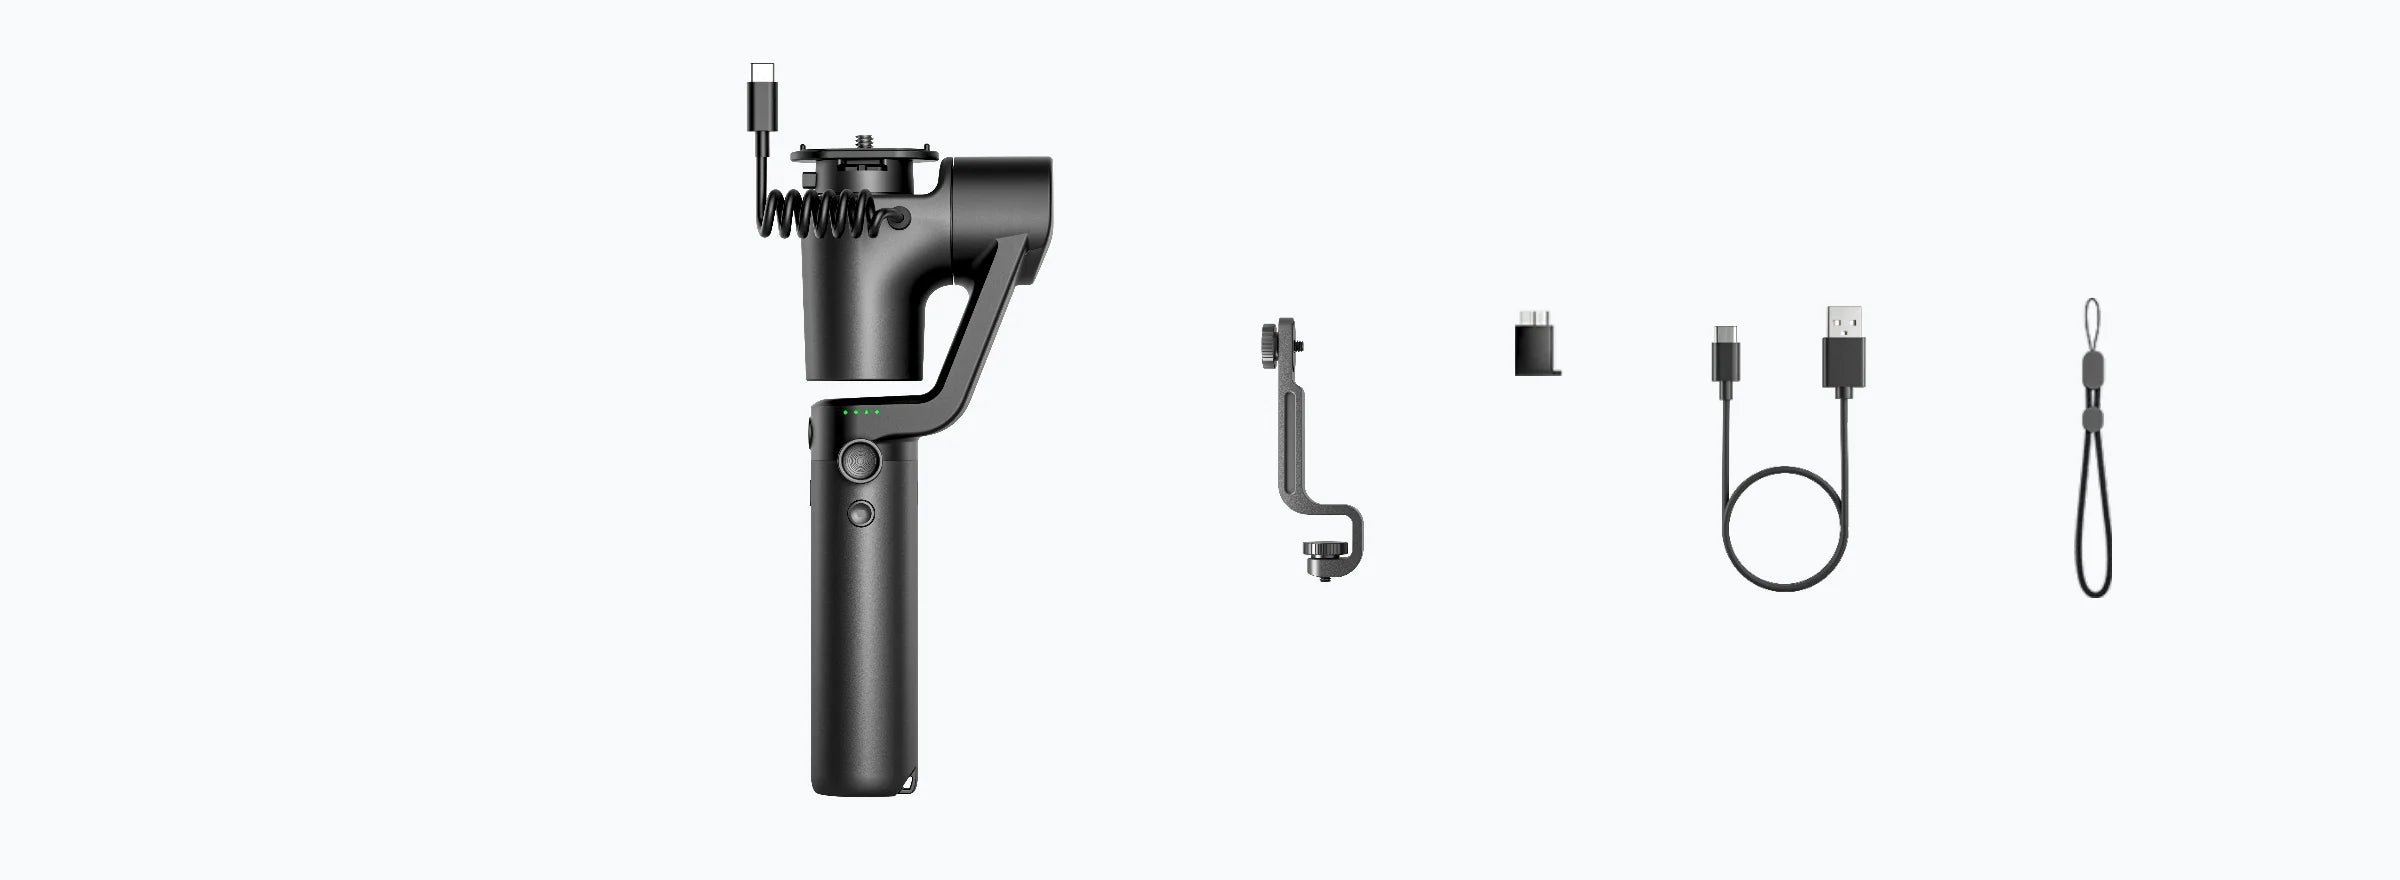
What’s in the Box?
POP 3 Plus Standard Edition


POP 3 Plus Advanced Edition
POP 3 Plus
Standard Edition
+
Dual-axis
Turntable Charger
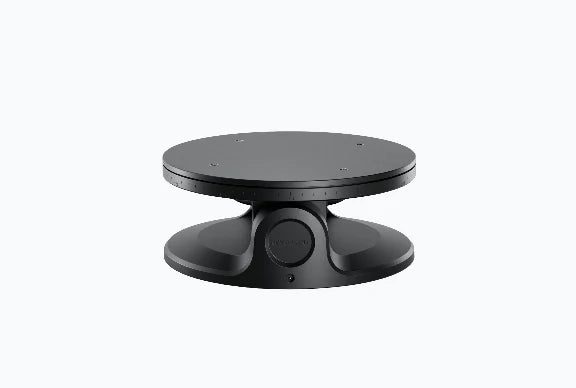
Dual-axis Turntable
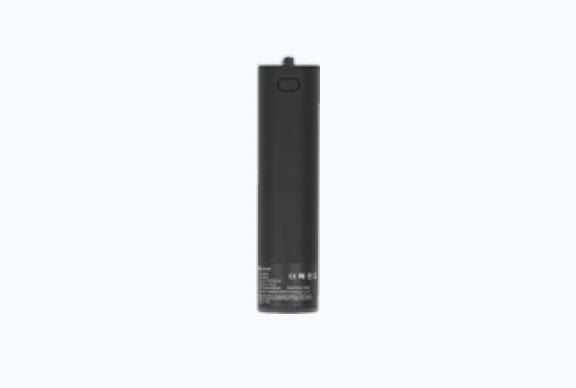
Power Bank
Reusable Sticky Pad
POP 3 Plus Premium Edition
POP 3 Plus
Standard Edition
+
Dual-axis
Turntable Charger
Dual-axis Turntable
Power Bank
Reusable Sticky Pad
+
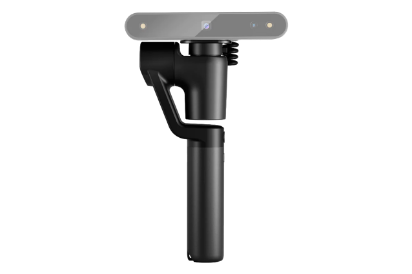
Handheld Stabilizer
Reduces point cloud errors and tracking loss due to shaking.
Intelligent Tracking Mode
Pan Locked Mode
Allows you to smoothly pan or tilt POP 3 as you move around the object.
FAQ
Scanning Scenarios:
The MINI series is designed for professionals who want to scan smaller objects such as industrial parts, jewelry, small statues, etc., capturing precise detail.
The POP series is designed for professionals who want to scan medium-sized objects, such as engine parts or vases.
The RANGE series is designed for professionals who want to scan large objects such as furniture, people, and vehicles, ensuring efficient and thorough scanning results.
The INSPIRE is for hobbyists, 3D printing enthusiasts, and makers who want to scan medium-sized objects.
The MIRACO is an all-in-one scanning system that captures small to large objects.
Recommended Scan Volumes:
MINI 2: 10 × 10 × 10 mm – 500 × 500 × 500 mm
POP 3 Plus: 20 × 20 × 20 mm – 2000 × 2000 × 2000 mm
RANGE 2: 50 × 50 × 50 mm – 4000 × 4000 × 4000 mm
INSPIRE: 50 × 50 × 50 mm – 1000 × 1000 × 1000 mm
MIRACO: 10 × 10 × 10 mm – 4000 × 4000 × 4000 mm
The Revopoint POP 3 Plus is the newest 3D scanner in the POP series. It differs from POP 3 in a few key ways. The point cloud detail is 30% better than POP 3 due to the projector's new optical zoom (up to x2 zoom), which improves the strength and focus of its structured light. Its brand-new glass calibration board improves the scanner's calibration precision and accuracy by 20%.Software adds a global marker tracking mode, greatly improving marker point capture stability, significantly reducing cumulative point cloud tracking errors, making point cloud fusion more precise, and overall scan size accuracy more stable.
It's a 9-axis IMU with a gyroscope, accelerometer, and magnetometer that all work together to help POP 3 Plus understand its location as you move the scanner around an object. This, in turn, helps POP 3 Plus provide smoother frame stitching and helps eliminate any faulty frames captured caused by shaking or moving too fast.
Connect the scanner to your PC and open Revo Scan. In Revo Scan 5’s Home Screen, click the settings icon next to the scanner’s name. Then click on the Start Calibration button to start the process. Follow the on-screen instructions to recalibrate your POP 3 Plus.
Note: IMU calibration is only available for scanners with an IMU.
It uses high-resolution infrared structured light, dual-depth cameras, and advanced algorithms to output detailed 3D models.
No, its algorithms and internal chip do most of the processing.
Windows PCs Requirements
System: Windows 10/11 (64-bit)
RAM: ≥ 16 GB
CPU: Intel Core i5 12th gen or better
Connectivity: USB 3.0 or better, Wi-Fi
No discrete GPU like an Nvidia or AMD graphics card is needed to use POP 3 Plus.
macOS Requirements
System: macOS 11.0 or better
RAM: ≥ 8 GB
CPU: M1 Pro or better
Connectivity: Thunderbolt 4 or better, Wi-Fi
Yes, but advanced scanning and post-processing skills are needed.
Android
System: Android 9.0 or better
RAM: ≥ 8 GB
Connectivity: USB or Wi-Fi
iOS
Models: Models after iPhone X; 10th generation iPad or later
RAM: > 4 GB
System: ≥ iOS 14.0
Connectivity: Wi-Fi
Windows
System: Windows 10/11 (64-bit)
RAM: ≥ 16 GB
CPU: Intel Core i5 12th gen or better
Connectivity: USB 3.0 or better, Wi-Fi
macOS
System: macOS 11.0 or better
CPU: M1 Pro or better
RAM: ≥ 8 GB
Connectivity: Thunderbolt 4 or better, Wi-Fi
Yes, it comes with Revo Scan for free. It is compatible with iOS, macOS, Android, and Windows devices and has many powerful scanning and post-processing tools.
Yes. You can download Revo Scan for free from the Support - Download page on Revopoint’s website or your device’s app store.
For Windows and macOS users, visit the Support—Download section on Revopoint’s website to download Revo Scan. iOS and Android users can find Revo Scan on the Apple App Store or Google Play Store. If you need detailed instructions, please refer to the User Manual on Revo Scan’s Learning page.
No, it doesn’t need to be connected to an internet-capable network to scan and edit your models. However, you need access to the internet for software updates and file transfers.
PC
Open Revo Scan and click the Learning button in the upper left corner to get the User Manual.
Phone
Open Revo Scan and tap the Settings icon in the upper right corner to get the User Manual.
PC
When you open Revo Scan, you will see a prompt if there is a new version available. Click the Update button to download the latest version. You can also download the latest version on the Support—Download page on Revopoint’s website.
Phone
iOS devices: Open the Apple App Store, search for Revo Scan, and tap the Update button.
Android devices: Open the Google Play Store, search for Revo Scan, and tap the Update button.
Revo Scan can export your models in PLY, OBJ, STL, ASC, 3MF, GLTF, and FBX for compatibility with most 3D modeling, slicer, and CAD software.
Point Cloud model: PLY, OBJ, ASC
Mesh model: PLY, OBJ, STL, FBX, GLTF, 3MF
Texture model: PLY, OBJ, FBX, GLTF
Yes, the scanned models can be output in STL, OBJ, and 3MF formats, which are compatible with most slicer software.
Yes, the 3D models made with Revopoint 3D scanners can be exported in formats compatible with most design software, such as Autodesk CAD, Blender, Maya, Rhino, ZBrush, Fusion 360, etc.
No, it’s only compatible with the Revo Scan software, which provides scanning and model-editing functions and can be downloaded from Revopoint’s website or your device's app store.
① Ensure the phone and PC are connected to the same Wi-Fi network.
② Open Revo Scan (PC) and click the New Project button on the Homepage.
③ Click the Import from Phone option in Revo Scan (PC)’s File menu.
④ Pick either the PIN code or the QR code transfer method.
⑤ Open Revo Scan (Mobile) and find the project to be transferred.
⑥ Tap the More button > Share icon in Revo Scan (Mobile).
⑦ Enter the PIN code or scan the QR code.
⑧ Start the file transfer.
Note: Don’t minimize the app or turn off the phone’s display during transfer, or it’ll fail.
Export the model
Open the model in Revo Scan and choose Export on the tab bar. Select the required format (e.g., PLY, OBJ, STL) and save the file to your computer.
Import the model into the third-party software
Open third-party software such as Blender and Maya.
Find the Import function (usually under the File menu).
Choose the format to import and select the model you exported from Revo Scan.
You can edit the model using third-party software once it is imported.
Please ensure that this software supports the format you choose.
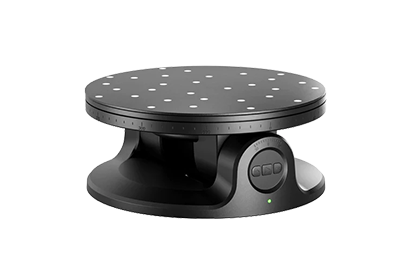
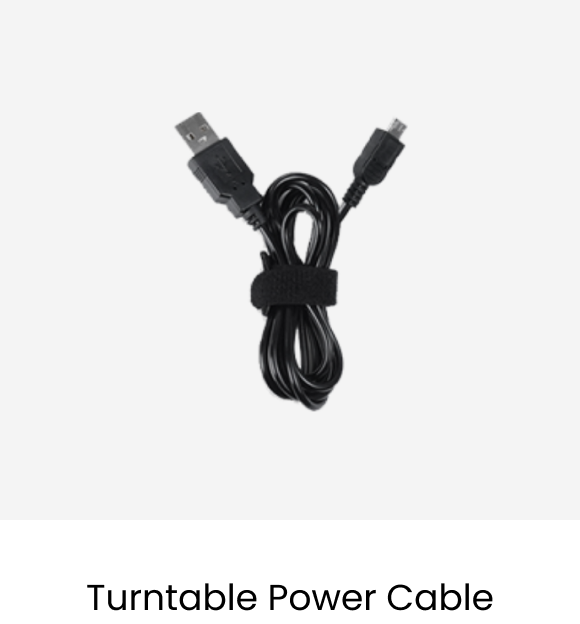
Step 1: Connect the Mini Turntable to a PC or a power socket via the turntable’s power cable. When the indicator turns solid green, it’s powered.
Step 2: Place the object on the center of the turntable.
Step 3: Flick the switch left or right to adjust the turntable’s rotational direction, and twist the dial to adjust the rotation speed.
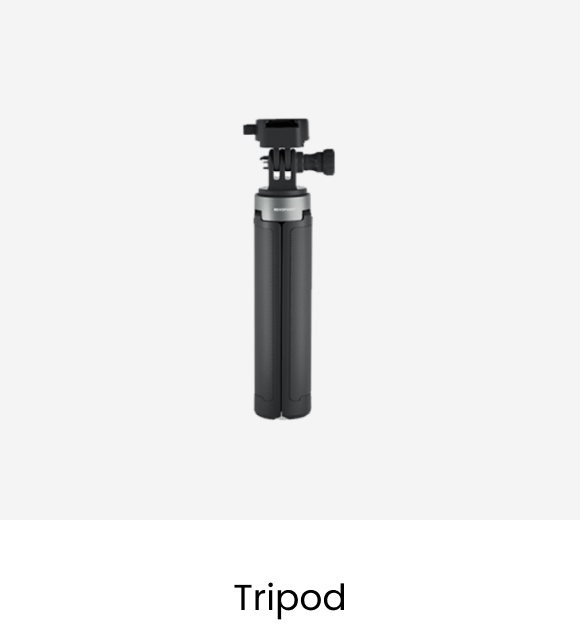
Step 4: Adjust the tripod to a suitable height and distance and aim the scanner at the object. Then, select the scanner’s settings and begin the scan.
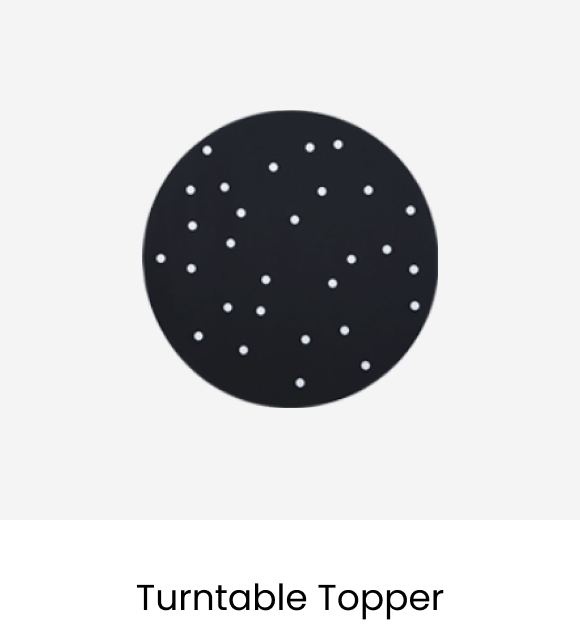
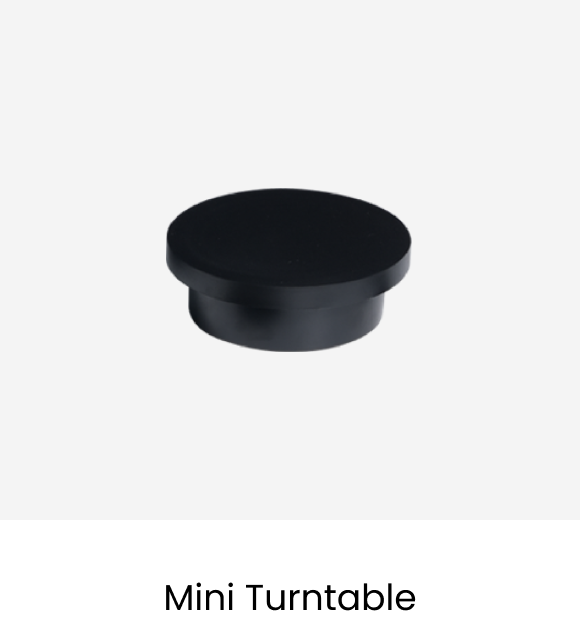
The Turntable Topper is a helpful accessory for scanning featureless objects in Marker Tracking mode. To begin your scan, place the Topper on top of a turntable, put the object on it, and choose Marker Tracking in Revo Scan.
Power Output: 12V/2A
Dimensions: (D) 200 mm X (H) 82 mm
Weight: About 771 g
Turntable Speed: 18 - 90 Seconds per Rotation
Max Load: 5 kg
Control Method: Via Buttons/App (Revo Scan/Revo Assistant)
Controls: Direction, Tilt, Speed and Start/Pause
- Dual-axis Turntable
- Power Cable
- Adapter
- Reusable Sticky Pad
- Turntable Topper
Calibrating your Revopoint 3D scanner using the Calibration Board is important to ensure scanning accuracy. Below are the basic steps for using the Calibration Board:
Preparation
Download and install the latest version of Revo Scan software to your computer and open it.
Connect the scanner to the USB 3.0 port on your computer using the cable included in the package and wait for the scanner to connect.
Make sure the scanner lens is clean and free of dust or stains.
Placing the calibration board
Place the calibration board on a flat and stable surface and make sure the pattern on the board is clearly visible.
Enter the calibration program
To enter the calibration program, click the "Scanner Calibration" option at the bottom left corner of the home page.
Start calibration and follow the displayed steps
Follow the on-screen instructions to complete the calibration.
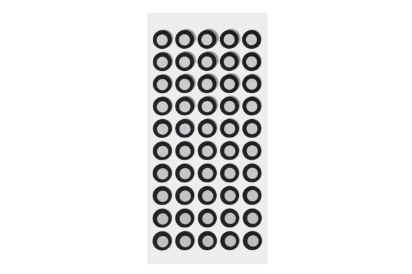
Marker points are stuck on or around objects without geometric features, so the POP 3 Plus can track what it is scanning. When using Marker points, place them in irregular patterns with around 3 - 4 cm between the markers across the object you’re scanning, and ensure that there are at least 5 marker points always in the frame when scanning.
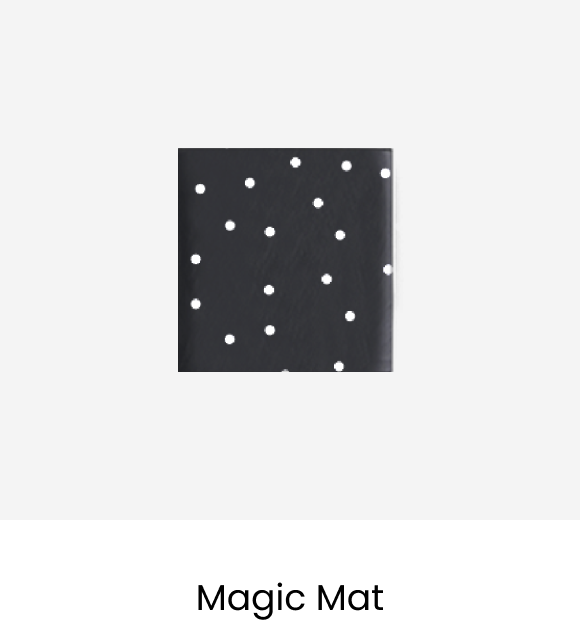
Magic Mat is a black mat with highly reflective marker points across its surface. It is designed to simplify scanning featureless objects by eliminating the need to place marker points on the item.
No, repeated scanning will make your model worse and extend the processing time. One scan close to the object will result in the best accuracy.
Like most 3D scanners, highly reflective, transparent, or dark objects can only be effectively scanned using 3D scanning spray to coat the object’s surface.
These objects are hard to scan because of their special surface features. You can either use scanning spray or other fine powders such as baby powder to coat their surface before scan.
Yes, but not in direct sunlight. Try scanning outside after the sun sets, just before sunrise, or on a very overcast day.
The recommended scan volume is 20 × 20 × 20 mm – 2000 × 2000 × 2000 mm.
Lighting: Scan the object in even and soft lighting and avoid shade or reflection.
Adjust RGB exposure: Toggle Color Scanning and adjust the RGB Camera exposure until the object’s color in the preview window is clear and sharp.
Adjust the white balance: In the RGB camera’s preview window, toggle the White Balance switch and adjust it till the colors look correct.
There are several reasons why tracking loss may occur:
① It may happen if the scanner is moved too fast or its position relative to the object changes too much during the scan. If this happens, move the scanner to a previously scanned area and wait several seconds for the scanner to regain tracking. Once this happens, hold the scanner steady and continue the scan at a constant speed.
② Tracking may be lost when scanning featureless objects like balls or cups. If this happens, you must stick markers on the object before scanning.
③ Tracking may be lost if an object has sharp contrasting color differences on its surfaces. To fix this, pause the scan and then adjust the Depth Camera’s exposure till the surfaces can be detected clearly.
Use markers: Stick markers on or around the object, or put the Magic Mat or Turntable Topper under the object. Ensure at least 5 markers can be detected in one frame during scanning, and choose Marker Tracking mode to scan.
Use reference objects: Place 1 to 3 reference objects with distinct features around the item you’re scanning and choose Feature Tracking mode.